How to install and use RetroArch
How to install RetroArch on Windows
Download the installer from this link -> https://www.retroarch.com/?page=platforms
How to install RetroArch on Linux
Arch based Linux distros
Open the terminal, then copy and paste this command:
|
|
Ubuntu based Linux distros
Open the terminal, then copy and paste this command:
|
|
Flatpak
Flatpak works on a lot of Linux distros, but you need to install it first.
Follow this link to know how to install Flatpak -> https://flatpak.org/setup/
Then copy and past these commands in the terminal:
|
|
Snap
Snap works on a lot Linux distros, but you need to install it first.
Follow this link to know how to install Snap -> https://snapcraft.io/docs/installing-snapd
Then copy and past this command in the terminal:
|
|
Advantages of using RetroArch
- Support for many emulators and opensource engines.
- Controller auto-configuration.
- Unified configuartions for all supported emulators.
- Playlists.
- Netplay.
- RetroAchievements.
- Video Recording and streaming.
- Rewind.
- Save and load state.
- Shaders.
Issues with RetroArch
- The user interface is not intuitive.
- Adding Arcade games for MAME emulator on RetroArch is harder than doing it on MAME itself.
- The application causes memory leak when it is used under KDE Plasma (Wayland) on Linux, and it behaves weirdly when it used under GNOME (Wayland) on Linux, so it is advised to run it under X11 (Xorg) on any Linux distribution.
Initial configurations
After opening the application for the first time, you need to do the following steps:
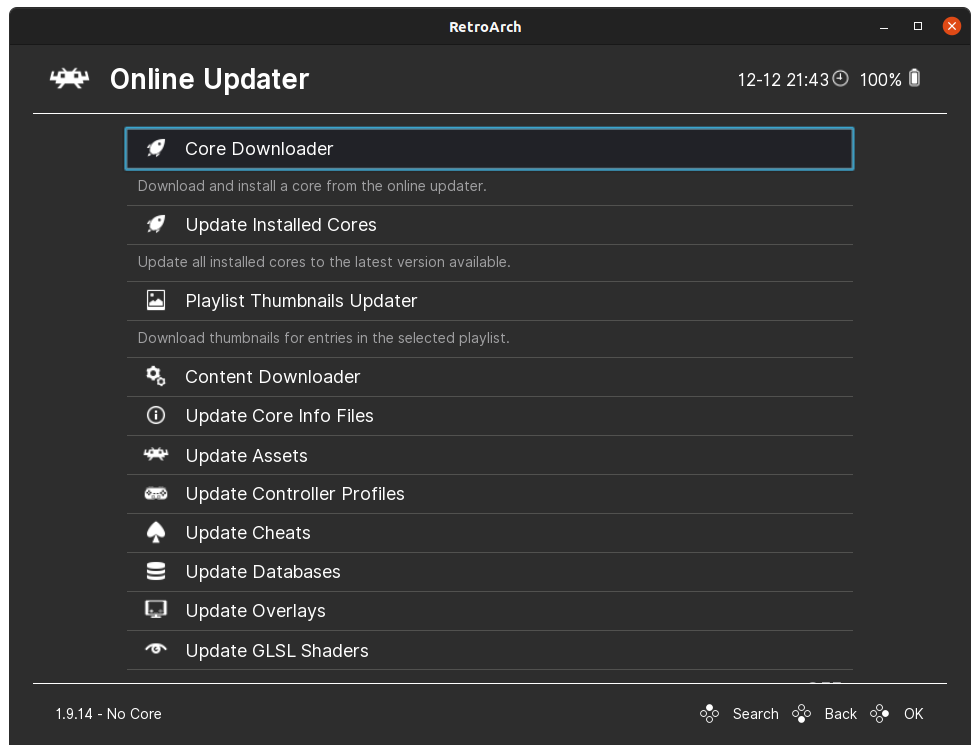
1- From Main Menu go to Online Updater

2- Now you need to update everything marked in following picture:

3- Close RetroArch, and open it again.
How to add emulators to RetroArch
RetroArch contains a lot of emulators that are called Cores, you can follow these steps to download them:
1- From Main Menu go to Online Updater
2- Click Core Downloader.
There are a lot of emulators to choose from.
Check the following table to know the best emulators to use on RetroArch.
The best emulators for RetroArch
Every entry in this table contains the name of the console followed by the name of the emulator to help choose the best emulator to choose.
| The name of the console | The name of the emulator |
|---|---|
| Arcade | MAME - current |
| Atari 2600 | Stella |
| Dos | DosBox |
| Nintendo 3DS | Citra |
| Nintendo DS | DeSmuME |
| Nintendo Game Boy & Color | SameBoy |
| Nintendo Game Boy Advance | mGBA VBA-M |
| Nintendo GameCube & Wii | Dolphin |
| Nintendo NES | Mesen Nestopia UE |
| Nintendo 64 | Mupen64Plus |
| Nintendo SNES / SFC | Snes9x bsnes |
| Sega Dreamcast | Flycast |
| Sega Master System Sega Mega Drive Sega Game Gear Sega CD |
Genesis Plus GX |
| Sony Playstation | PCSX ReARMed DuckStation |
| Sony Playstation 2 | PCSX2 |
| Sony Playstation Portable | PPSSPP |
How to add your games to RetroArch
The tutorial will cover how to add games to 8 different emulators which is enough for most use cases.
How to add Arcade games to RetroArch
1- Add MAME (Arcade emulator) to RetroArch
- From Main Menu go to Online Updater
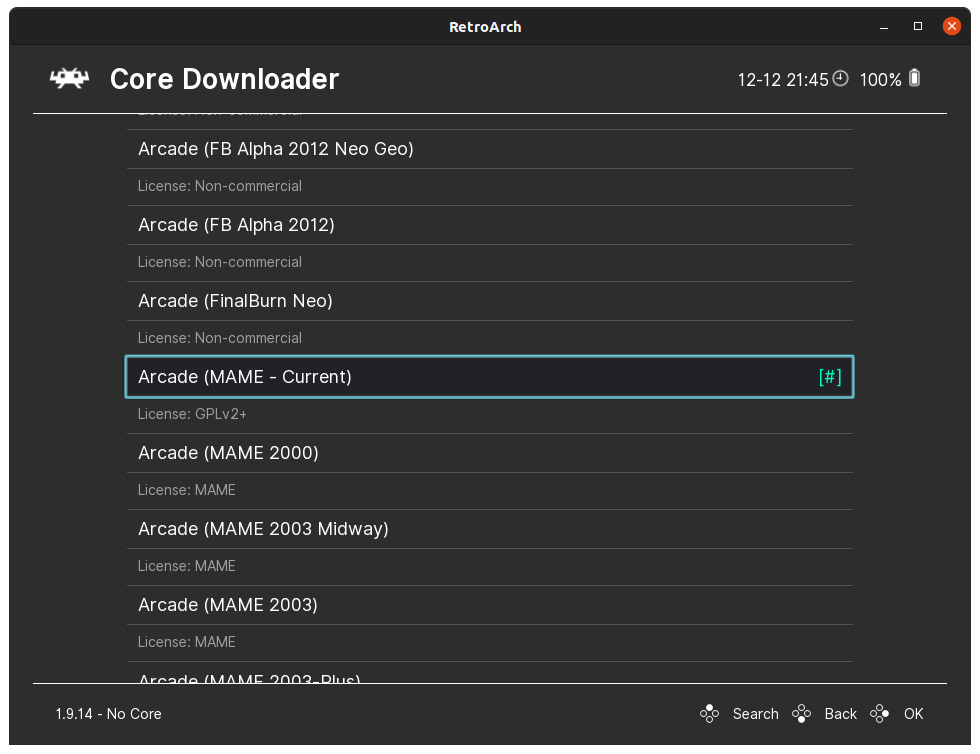
- Click Core Downloader.
- Choose Arcade (MAME - Current)
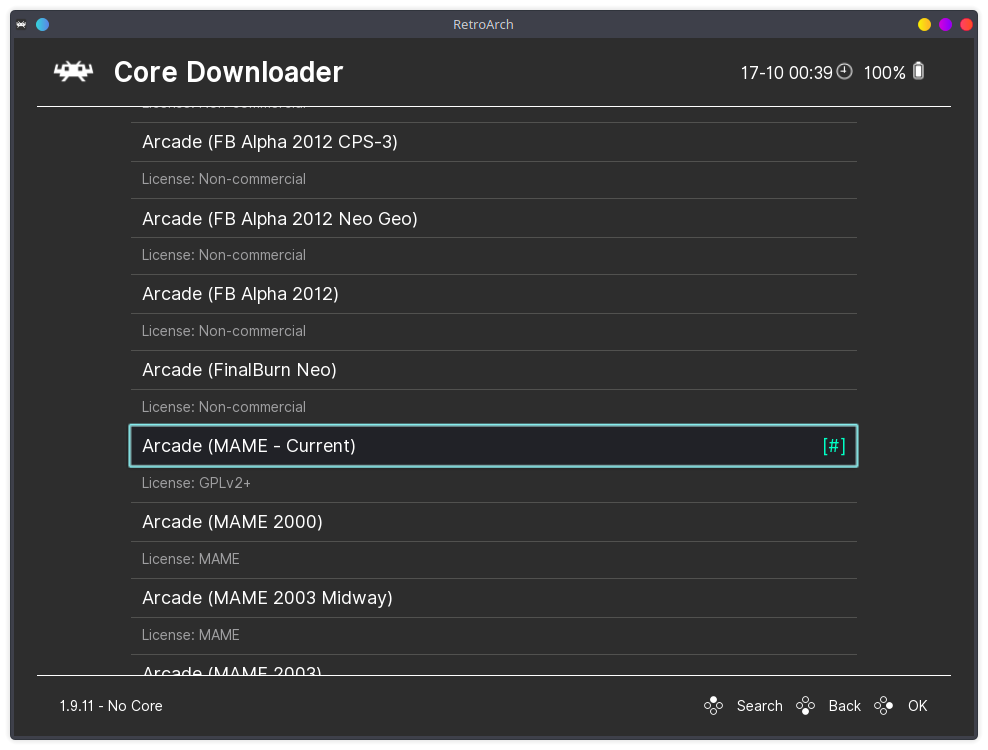
- Wait until it is successfully downloaded.
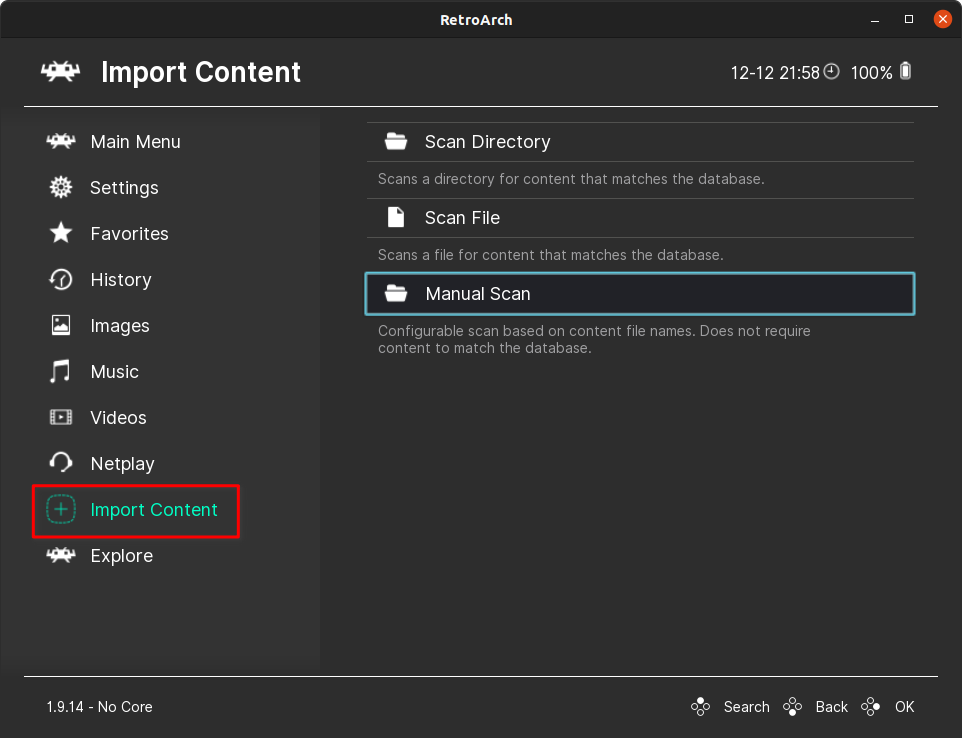
3- Add your arcade games to a playlist
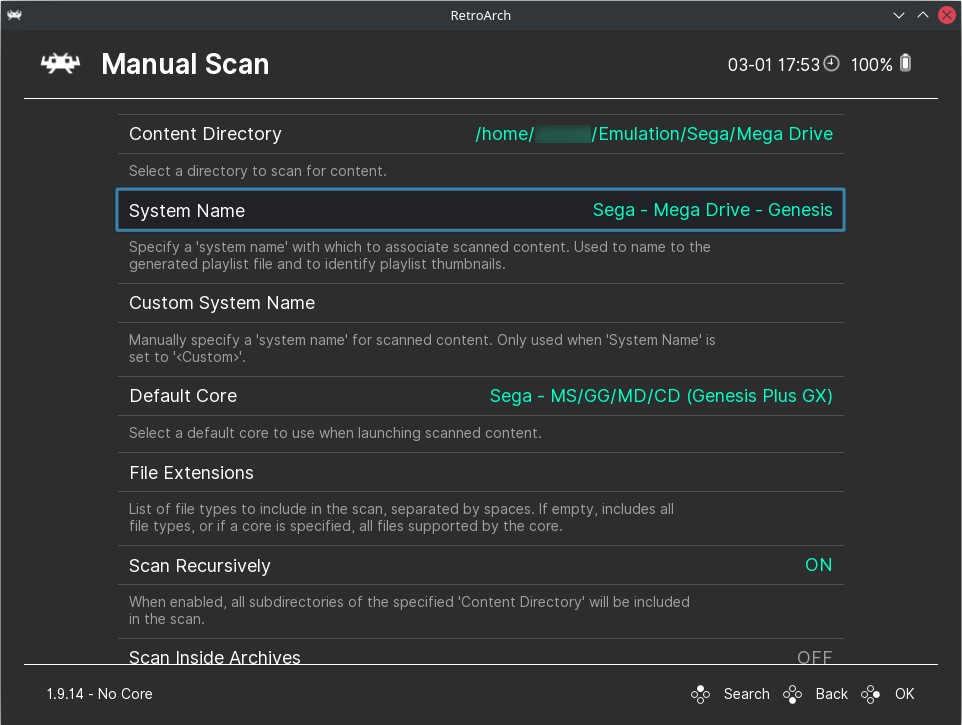
- From Import Content choose Manual Scan
-
Click Content Directory and choose the location where you stored your arcade games.
-
Click System Name and select MAME.
-
Click Default Core and select Arcade (MAME - Current)
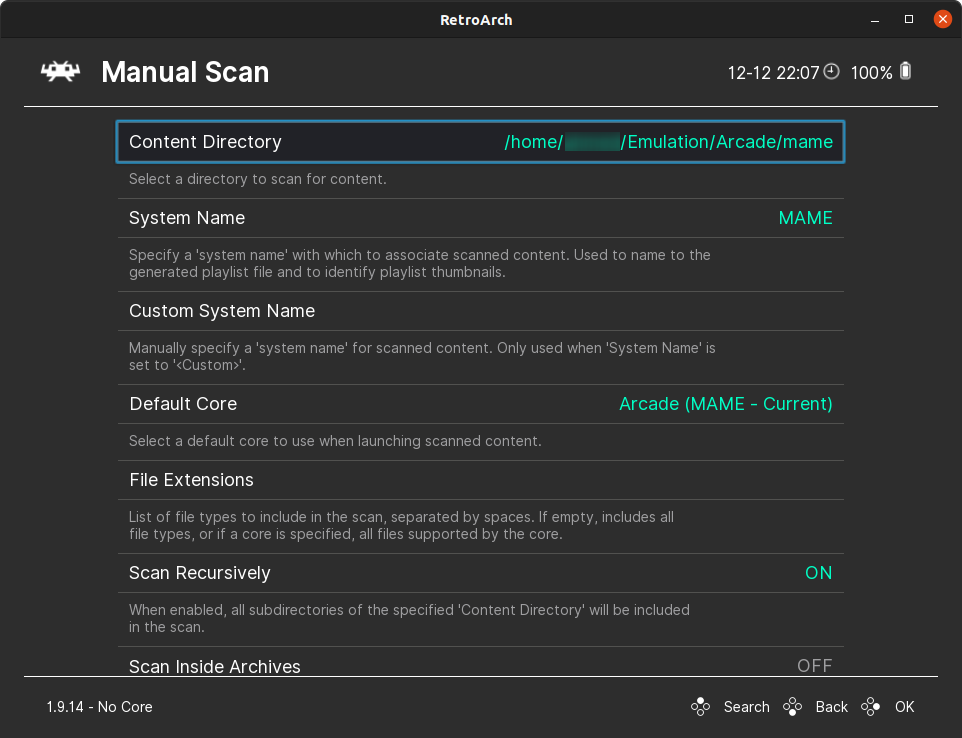
- Scroll down and click Start Scan.
4- Fix the names of the imported games
There is an issue with importing arcade games to RetroArch, and to fix that do the following steps:
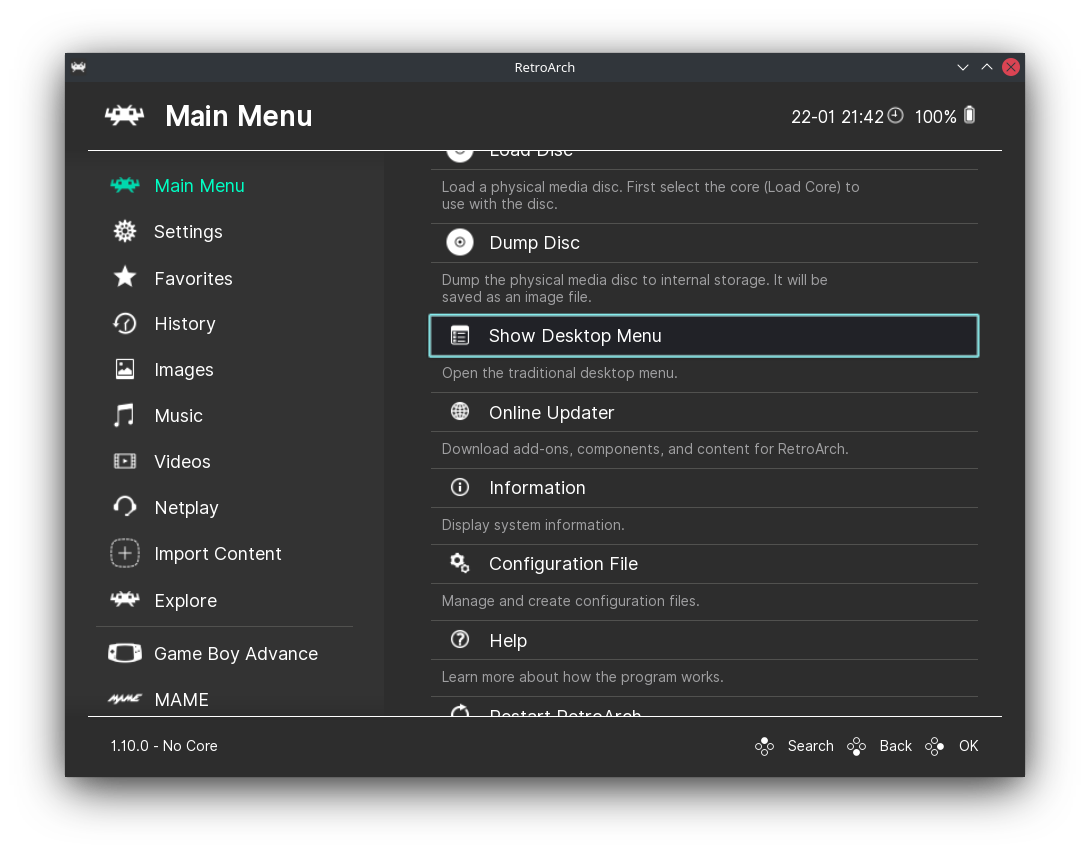
- From Main Menu choose Show Desktop Menu
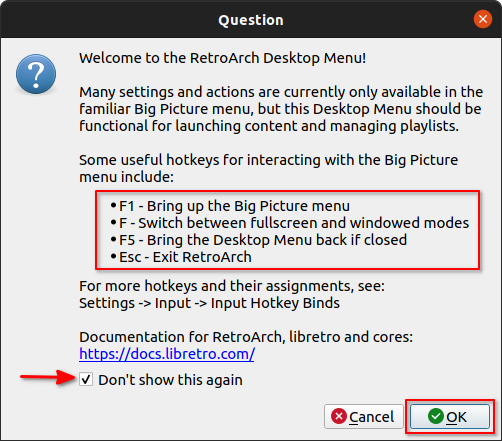
- This window will pop up, memorize the hotkeys, then tick Don’t show again, and click OK.
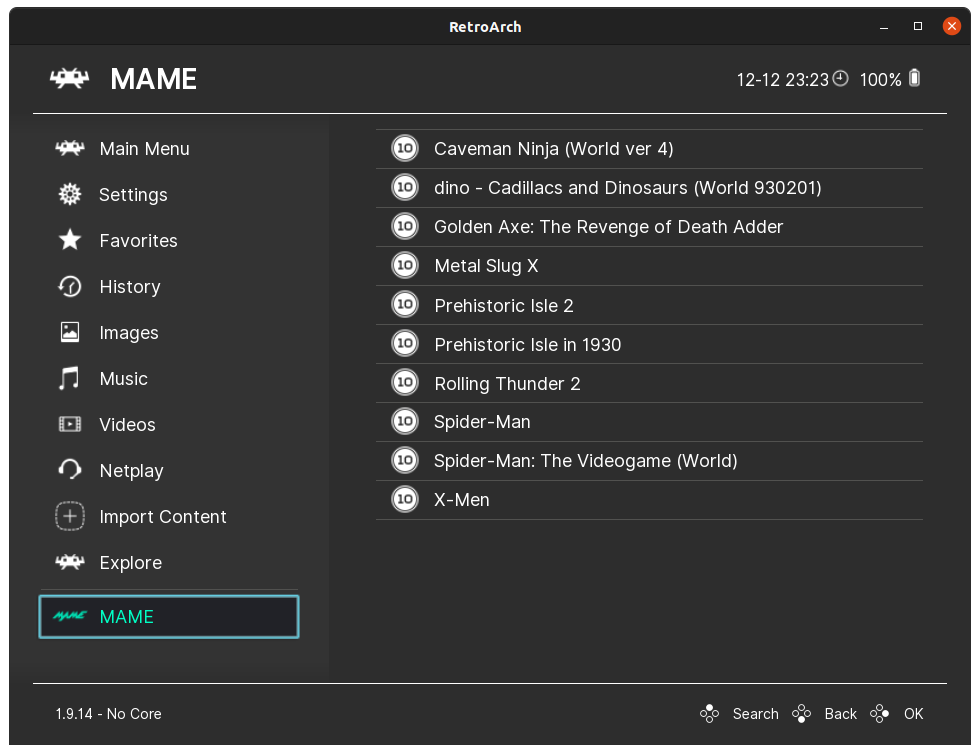
- As you can see, RetroArch imported the arcade games with their compressed files' names, and to fix that you need to rename each entry with the correct name.

-
Click f2 to rename the entries.
-
If you do not know what is the name of each entry, search by its name using Google Search.
-
Delete the unwanted entries like neogeo and qsound_hle by selecting them and clicking delete (that will delete them from the menu, not from your machine).
-
You can add a box art to your added games by drag and drop them at the Boxart square at the bottom right side.
- After renaming the entries manually, close the desktop menu. Now, you will find a new entry with the name MAME at the bottom of the main window.
How to add Nintendo NES games to RetroArch
1- Add Mesen to RetroArch
- From Main Menu choose Online Updater
- Click Core Downloader.
- Choose Nintendo - NES / Famicom (Mesen)
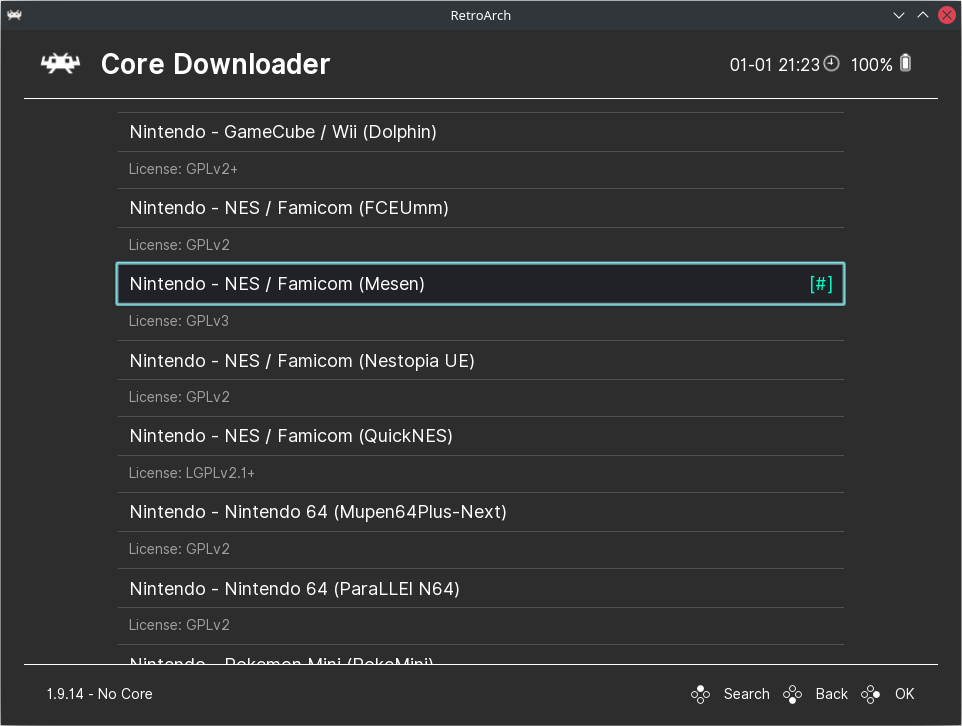
- Wait until it is successfully downloaded.
3- Add your Nintendo NES games to a playlist
- From Import Content choose Manual Scan
-
Click Content Directory and choose the location where you stored your Nintendo NES games.
-
Click System Name and select Nintendo - Nintendo Entertainment System.
-
Click Default Core and select Nintendo - NES / Famicom (Mesen)
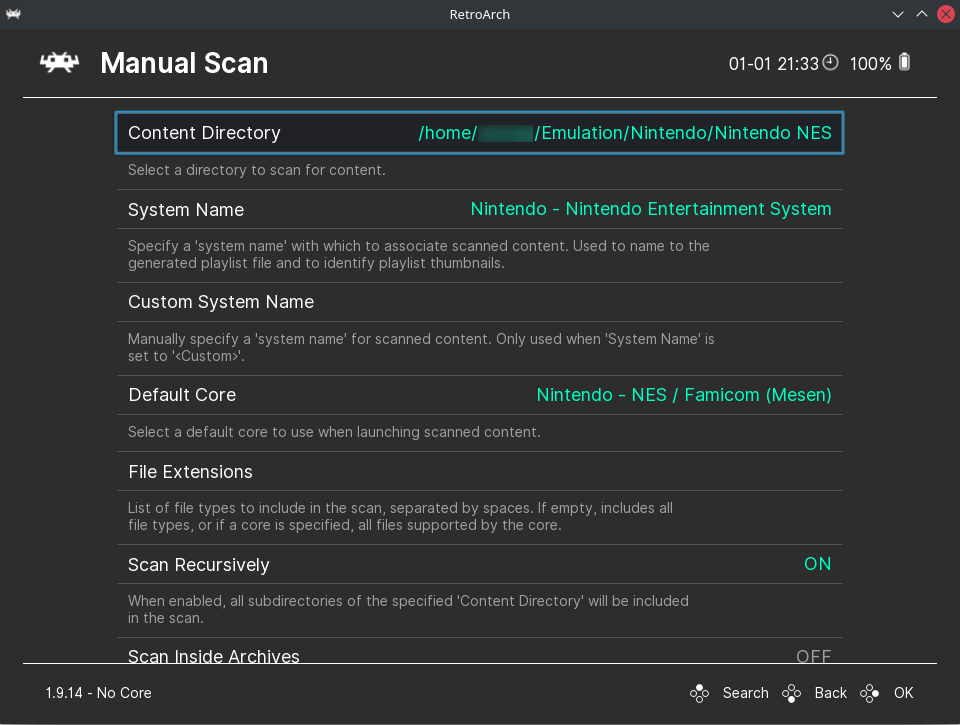
- Scroll down and click Start Scan.
4- Download thumbnails for your added games
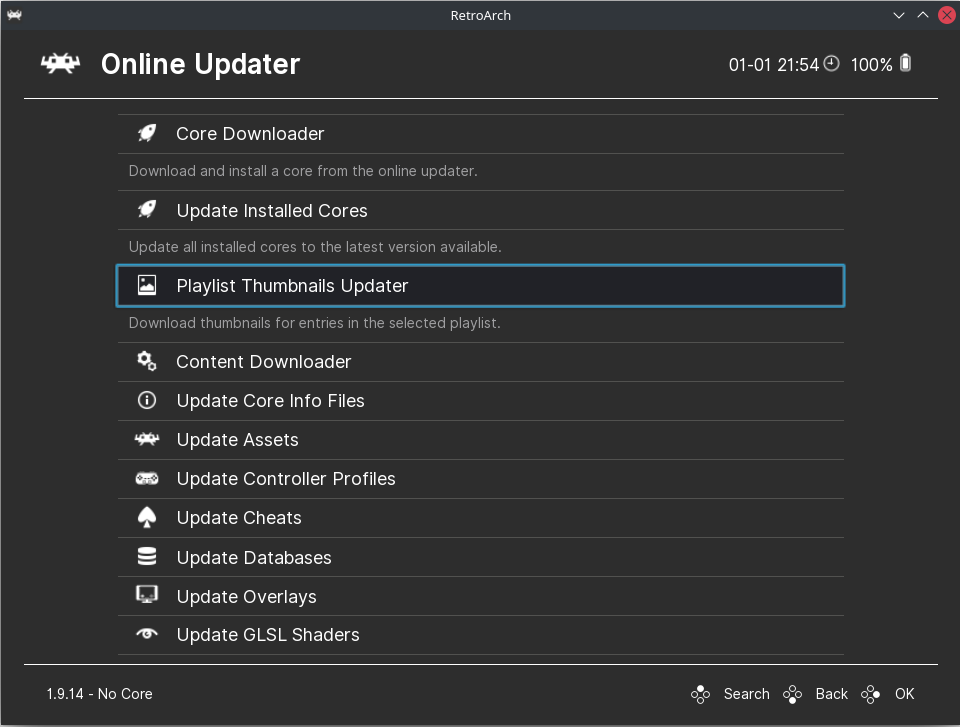
- From Main Menu choose Online Updater
- Click Playlist Thumbnails Updater
- Click Nintendo - Nintendo Entertainment System
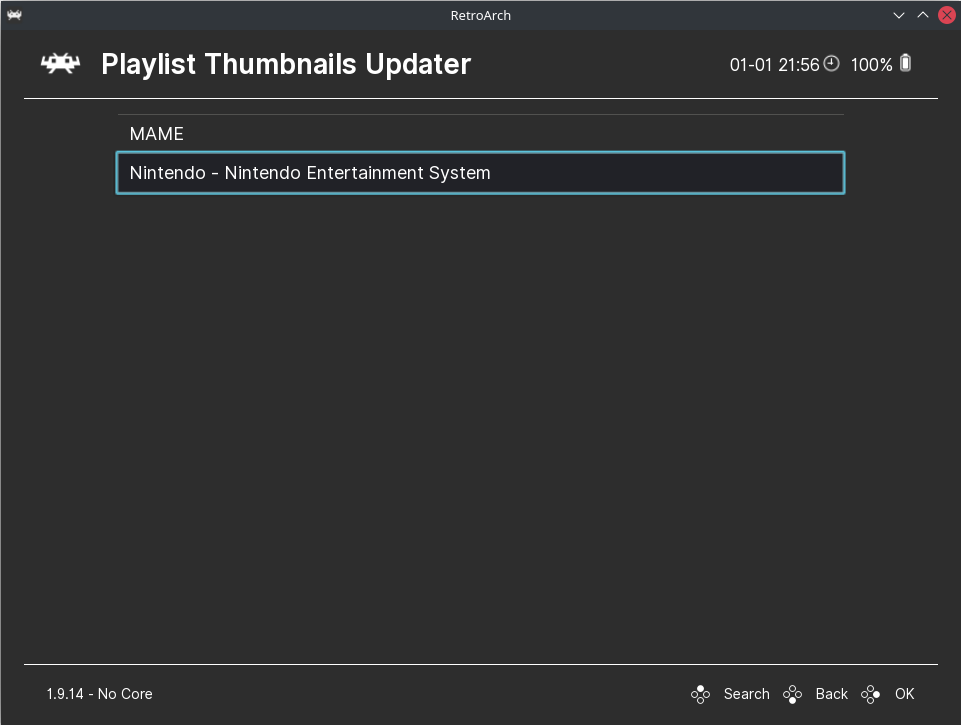
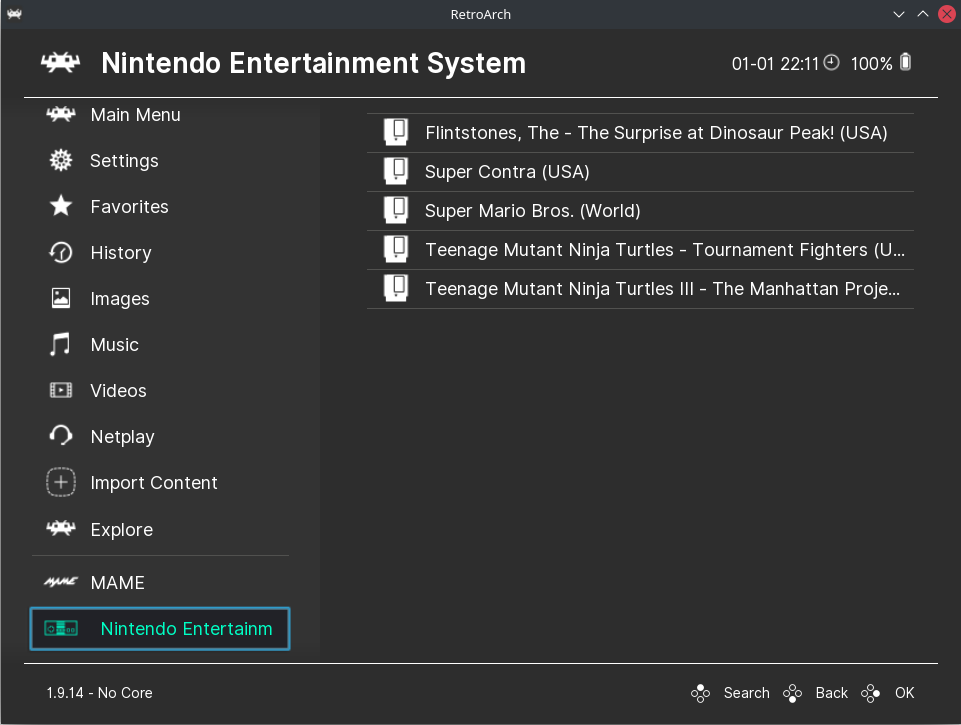
- Now, you will find a new entry with the name Nintendo Entertainment System at the bottom of the main window.
How to add Nintendo SNES games to RetroArch
1- Add Snes9x to RetroArch
- From Main Menu choose Online Updater
- Click Core Downloader.
- Choose Nintendo - SNES / SFC (Snes9x - Current)
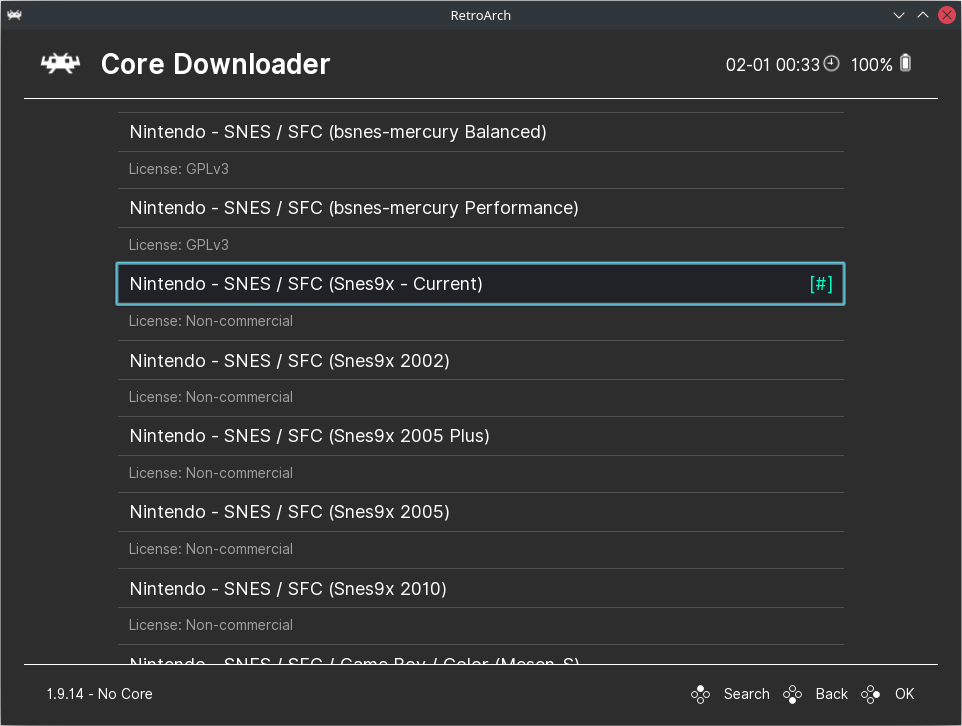
- Wait until it is successfully downloaded.
3- Add your Nintendo SNES games to a playlist
- From Import Content choose Manual Scan
-
Click Content Directory and choose the location where you stored your Nintendo SNES games.
-
Click System Name and select Nintendo - Super Nintendo Entertainment System.
-
Click Default Core and select Nintendo - SNES / SFC (Snes9x - Current)
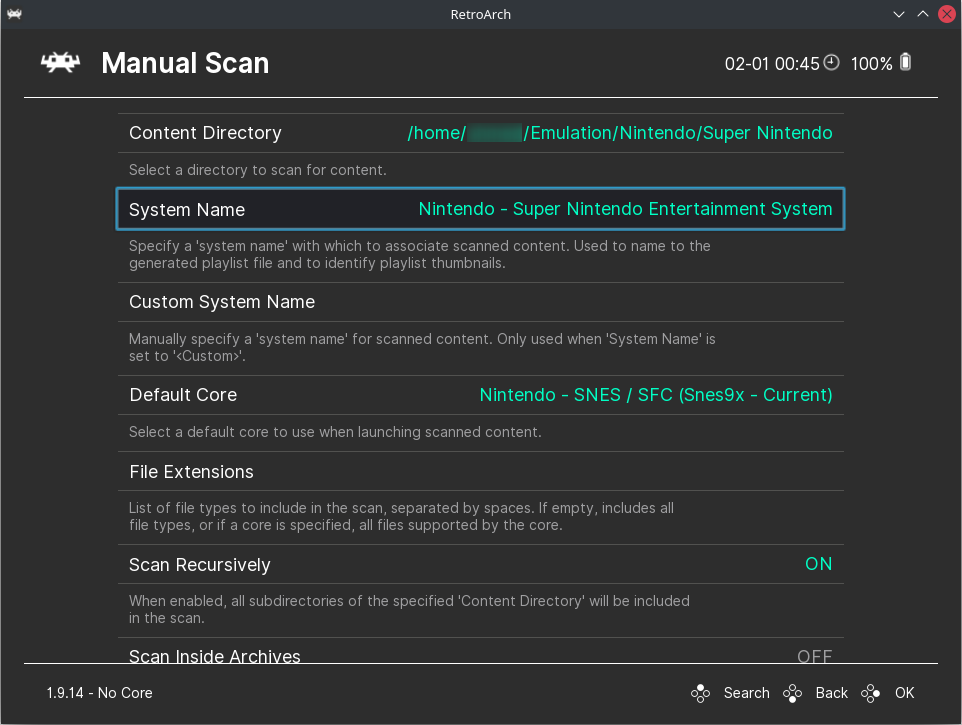
- Scroll down and click Start Scan.
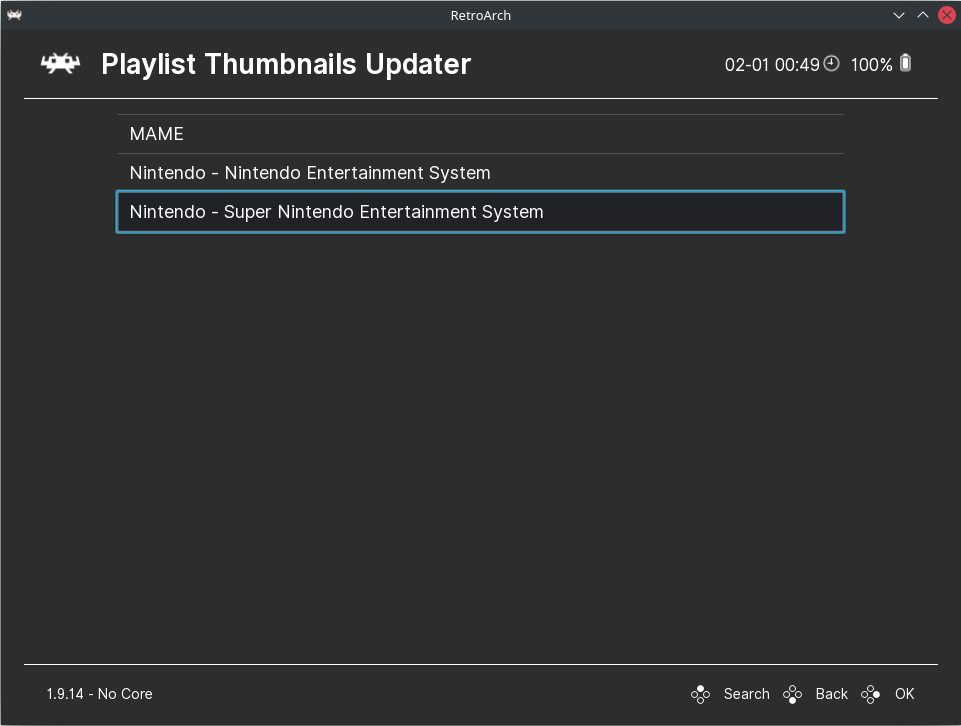
4- Download thumbnails for your added games
- From Main Menu choose Online Updater
- Click Playlist Thumbnails Updater
- Click Nintendo - Super Nintendo Entertainment System
- Now, you will find a new entry with the name Super Nintendo Entertainment System at the bottom of the main window.
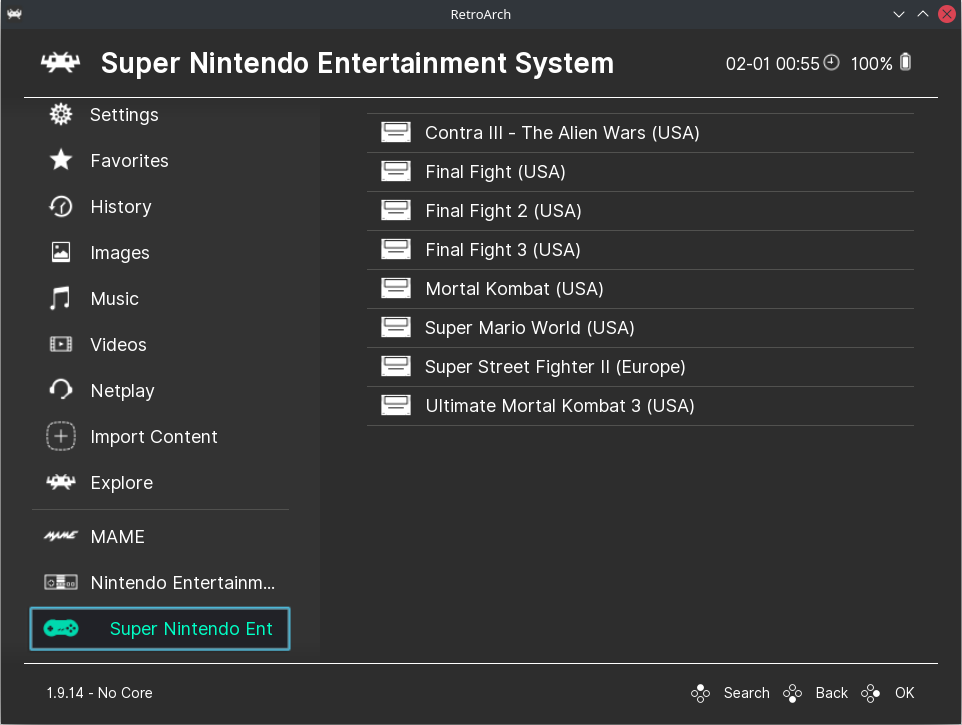
How to add Nintendo DS games to RetroArch
1- Add DeSmuME (Nintendo DS emulator) to RetroArch
- From Main Menu choose Online Updater
- Click Core Downloader.
- Choose Nintendo - DS (DeSmuME)
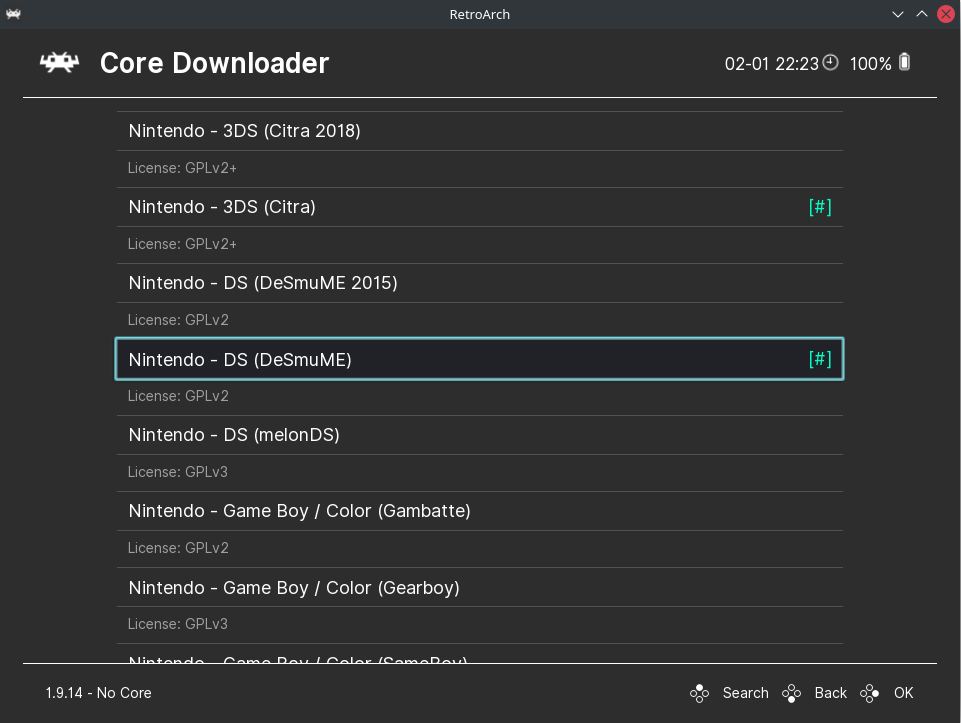
- Wait until it is successfully downloaded.
3- Add your Nintendo DS games to a playlist
- From Import Content choose Manual Scan
-
Click Content Directory and choose the location where you stored your Nintendo DS games.
-
Click System Name and select Nintendo - Nintendo DS.
-
Click Default Core and select Nintendo - DS (DeSmuME)
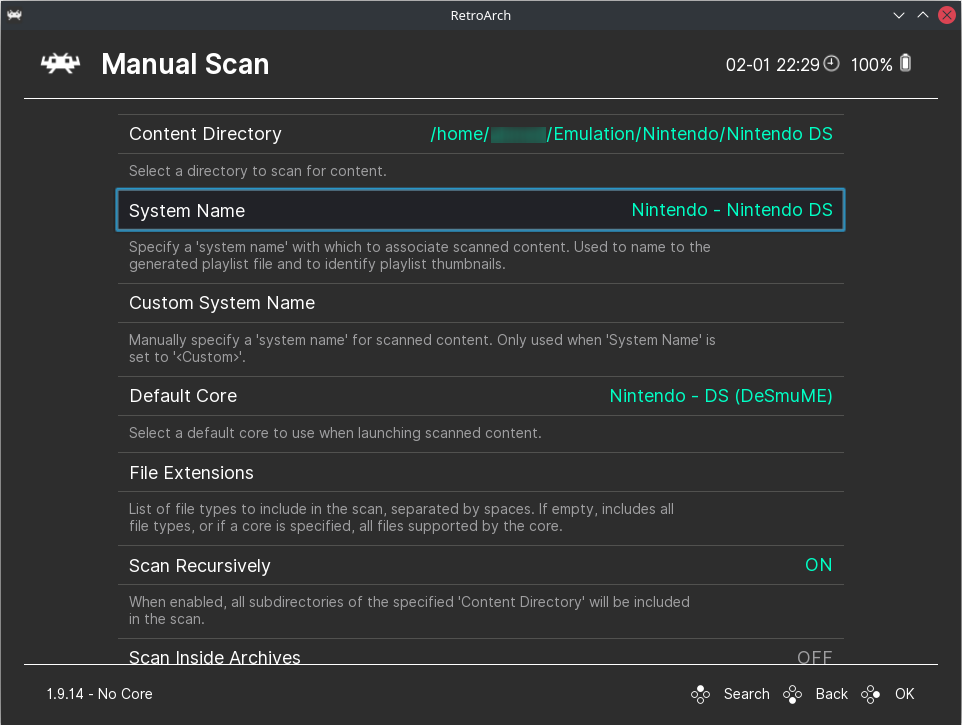
- Scroll down and click Start Scan.
4- Download thumbnails for your added games
- From Main Menu choose Online Updater
- Click Playlist Thumbnails Updater
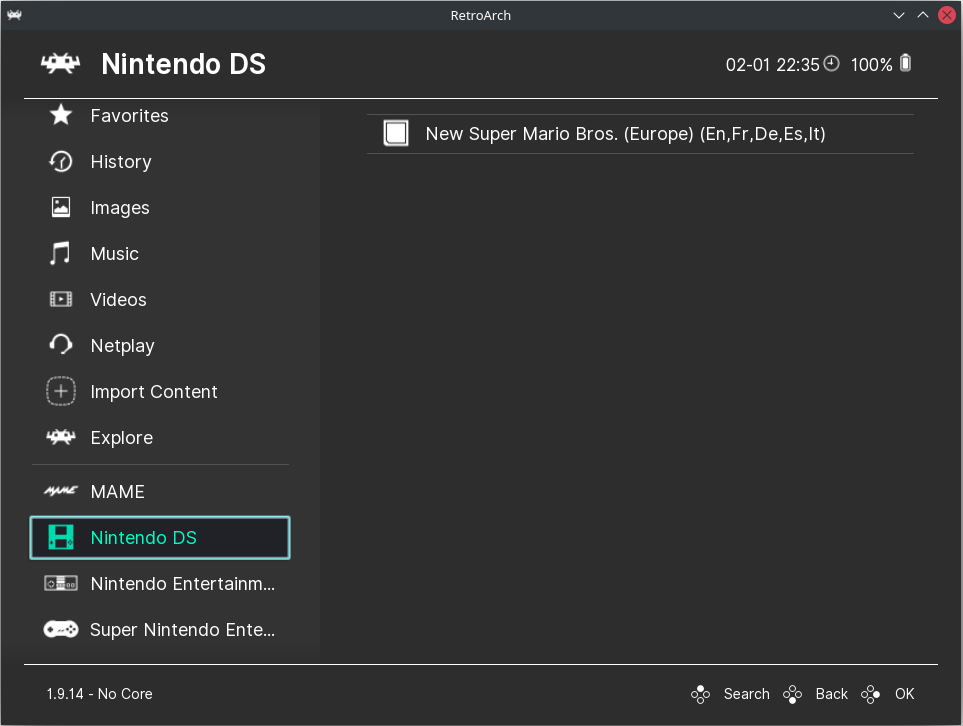
- Click Nintendo - Nintendo DS
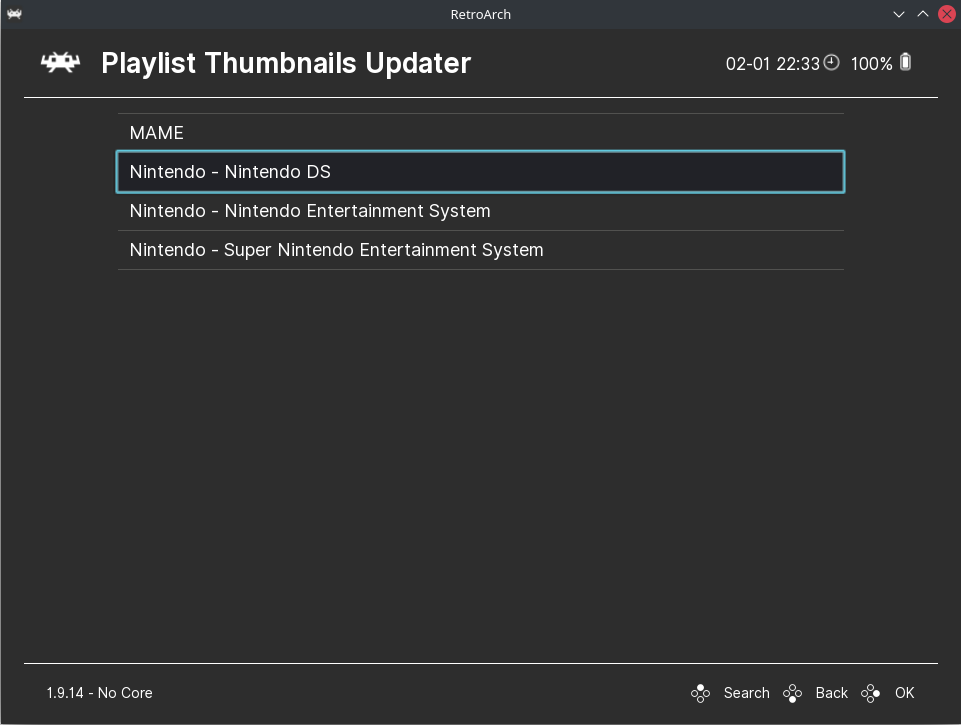
- Now, you will find a new entry with the name Nintendo DS at the bottom of the main window.
How to add Nintendo 3DS games to RetroArch
1- Add Citra (Nintendo 3DS emulator) to RetroArch
- From Main Menu choose Online Updater
- Click Core Downloader.
- Choose Nintendo - 3DS (Citra)
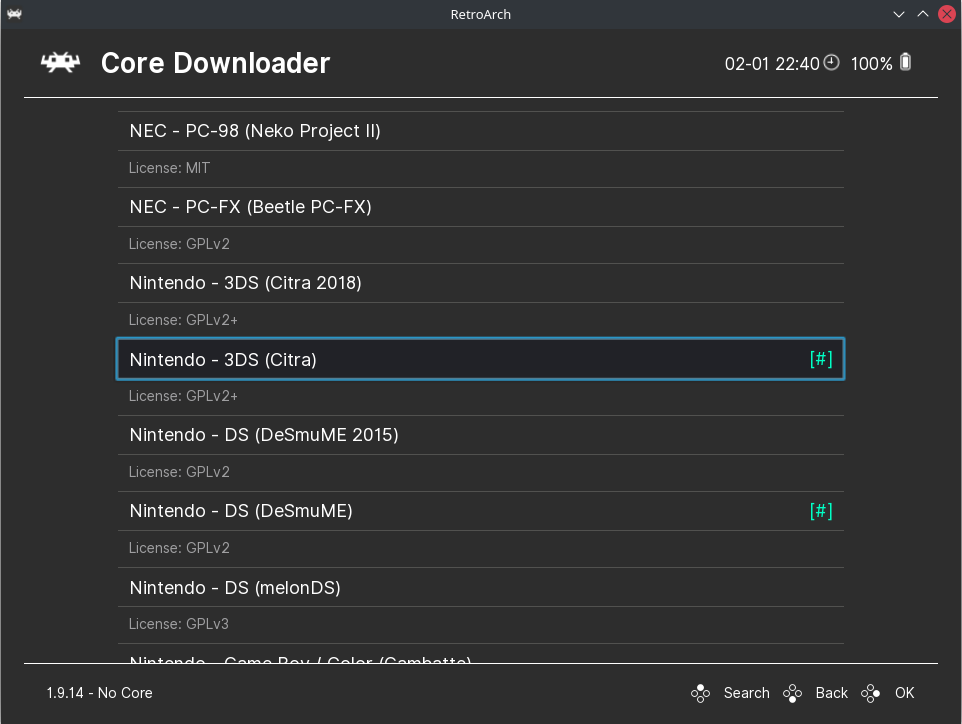
- Wait until it is successfully downloaded.
3- Add your Nintendo 3DS games to a playlist
- From Import Content choose Manual Scan
-
Click Content Directory and choose the location where you stored your Nintendo 3DS games.
-
Click System Name and select Nintendo - Nintendo 3DS.
-
Click Default Core and select Nintendo - 3DS (Citra)
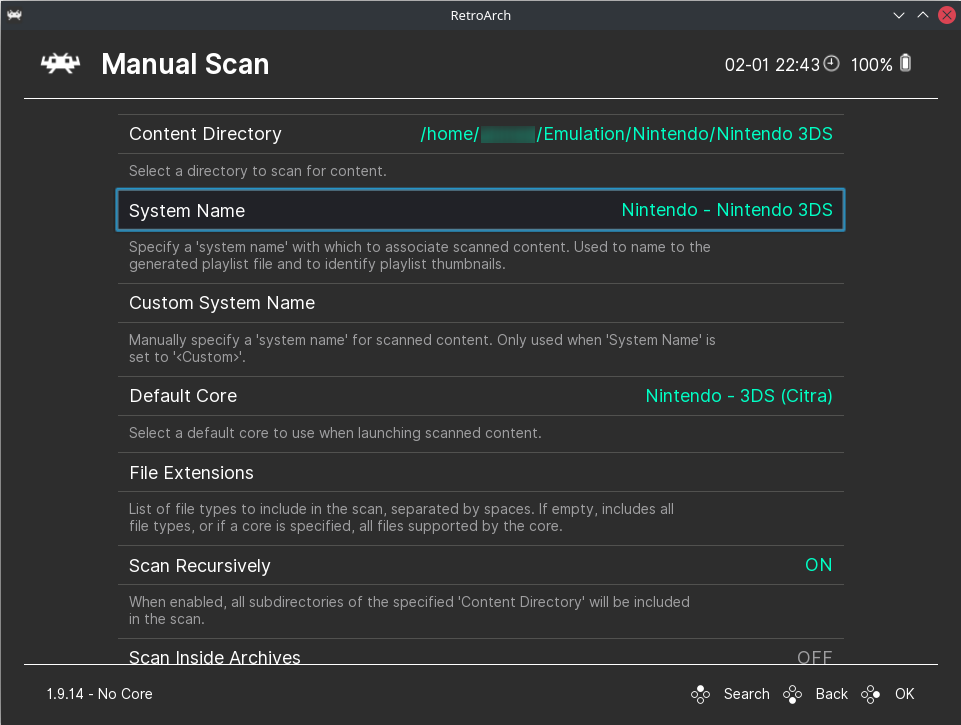
- Scroll down and click Start Scan.
4- Download thumbnails for your added games
- From Main Menu choose Online Updater
- Click Playlist Thumbnails Updater
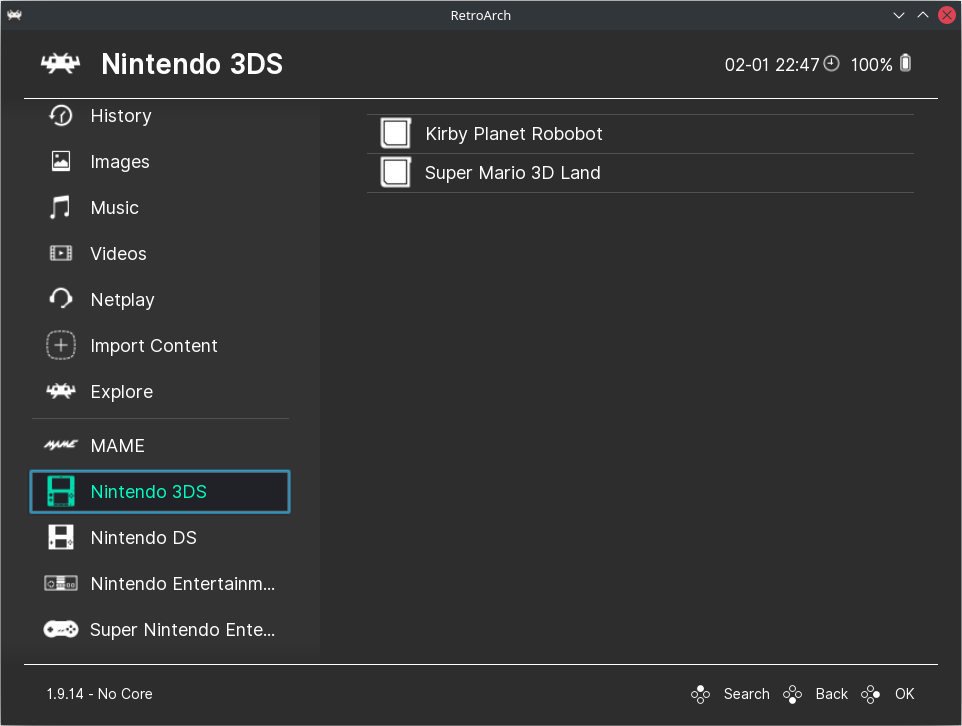
- Click Nintendo - Nintendo 3DS
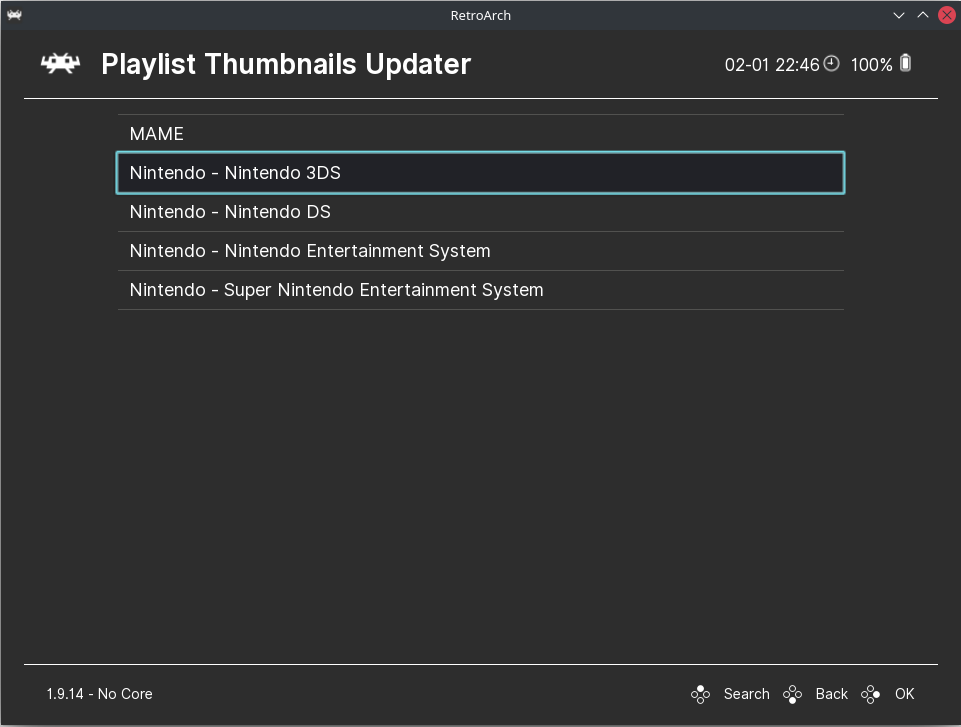
- Now, you will find a new entry with the name Nintendo 3DS at the bottom of the main window.
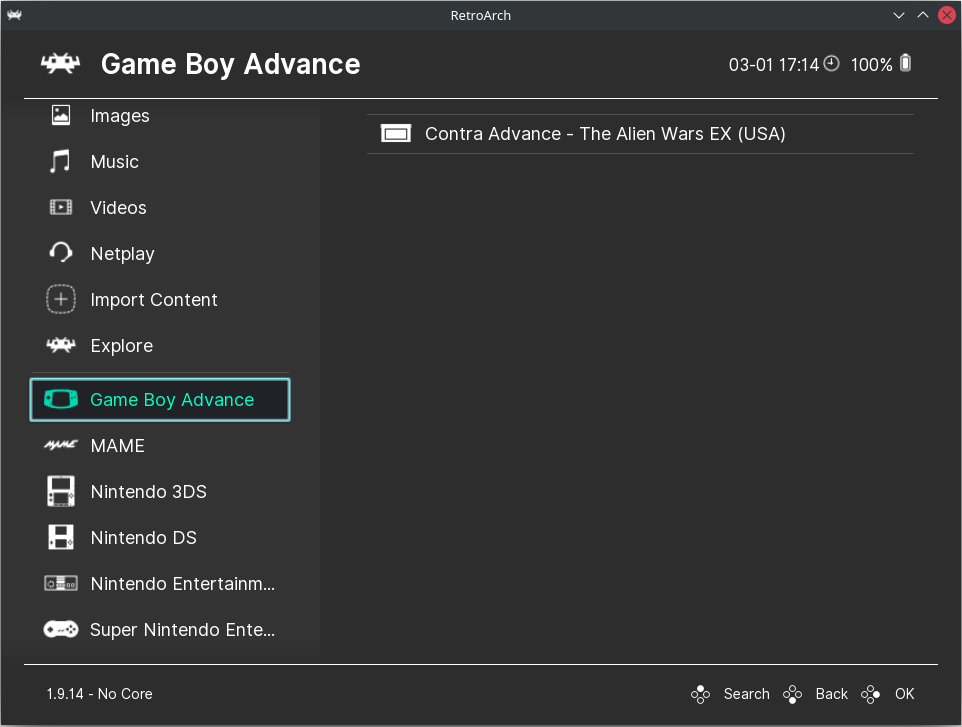
How to add Nintendo - Game Boy Advance games to RetroArch
1- Add mGBA (Game Boy Advance emulator) to RetroArch
- From Main Menu choose Online Updater
- Click Core Downloader.
- Choose Nintendo - Game Boy Advance (mGBA)
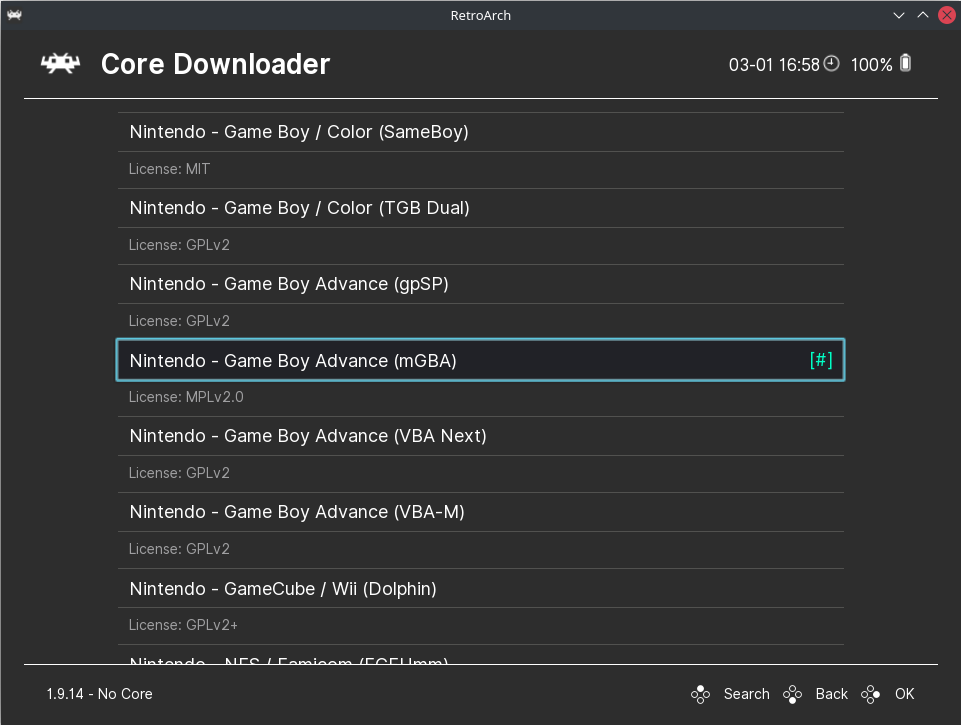
- Wait until it is successfully downloaded.
3- Add your Game Boy Advance games to a playlist
- From Import Content choose Manual Scan
-
Click Content Directory and choose the location where you stored your Game Boy Advance games.
-
Click System Name and select Nintendo - Game Boy Advance.
-
Click Default Core and select Nintendo - Game Boy Advance (mGBA)
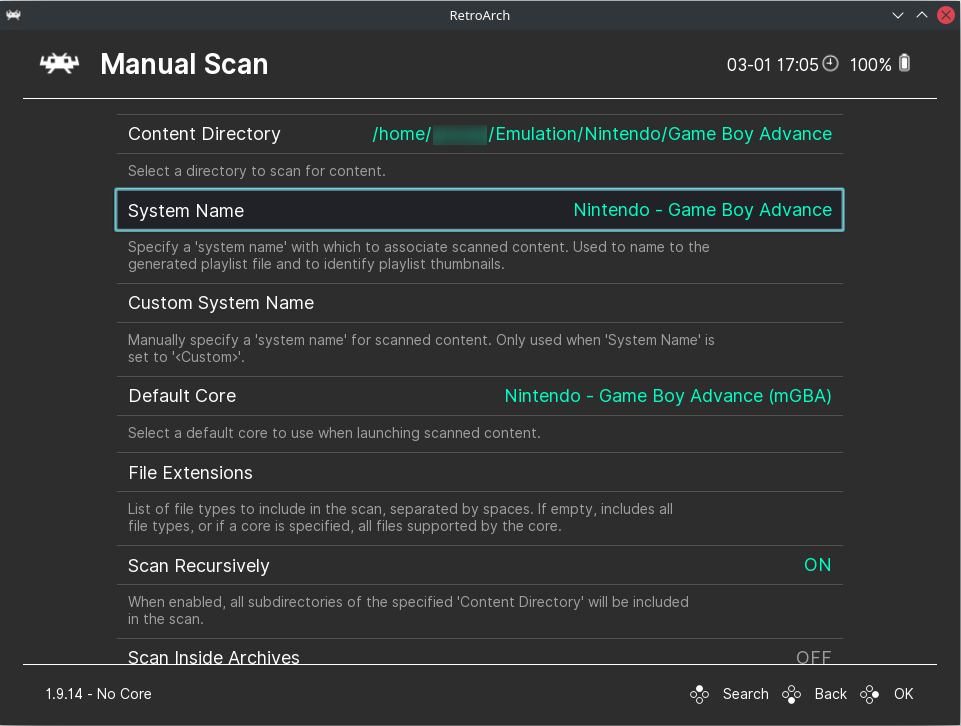
- Scroll down and click Start Scan.
4- Download thumbnails for your added games
- From Main Menu choose Online Updater
- Click Playlist Thumbnails Updater
- Click Nintendo - Game Boy Advance
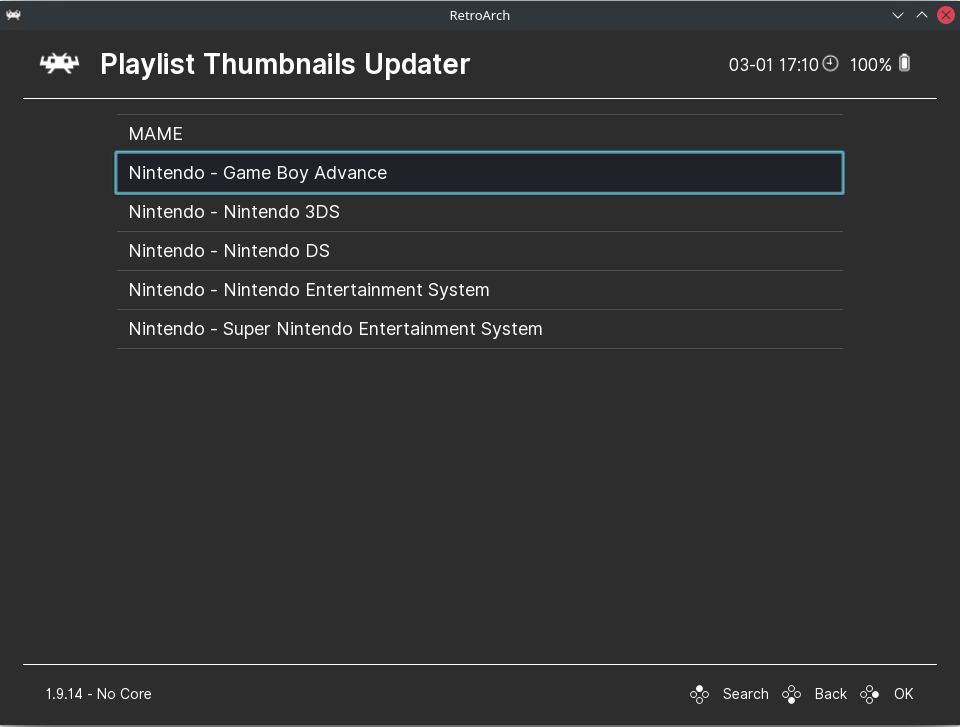
- Now, you will find a new entry with the name Game Boy Advance at the bottom of the main window.
How to add Sega - Mega Drive - Genesis games to RetroArch
1- Add Genesis Plus GX to RetroArch
- From Main Menu choose Online Updater
- Click Core Downloader.
- Choose Sega MS/GG/MD/CD (Genesis Plus GX)

- Wait until it is successfully downloaded.
3- Add your Game Boy Advance games to a playlist
- From Import Content choose Manual Scan
-
Click Content Directory and choose the location where you stored your Game Boy Advance games.
-
Click System Name and select Sega - Mega Drive - Genesis.
-
Click Default Core and select Sega - MS/GG/MD/CD (mGBA)
- Scroll down and click Start Scan.
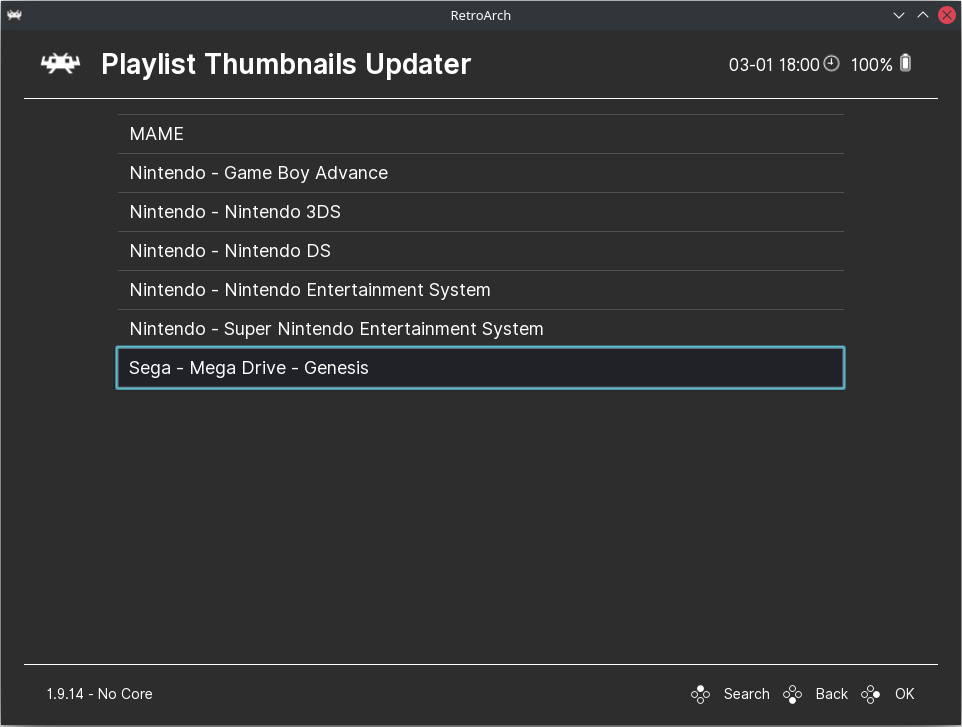
4- Download thumbnails for your added games
- From Main Menu choose Online Updater
- Click Playlist Thumbnails Updater
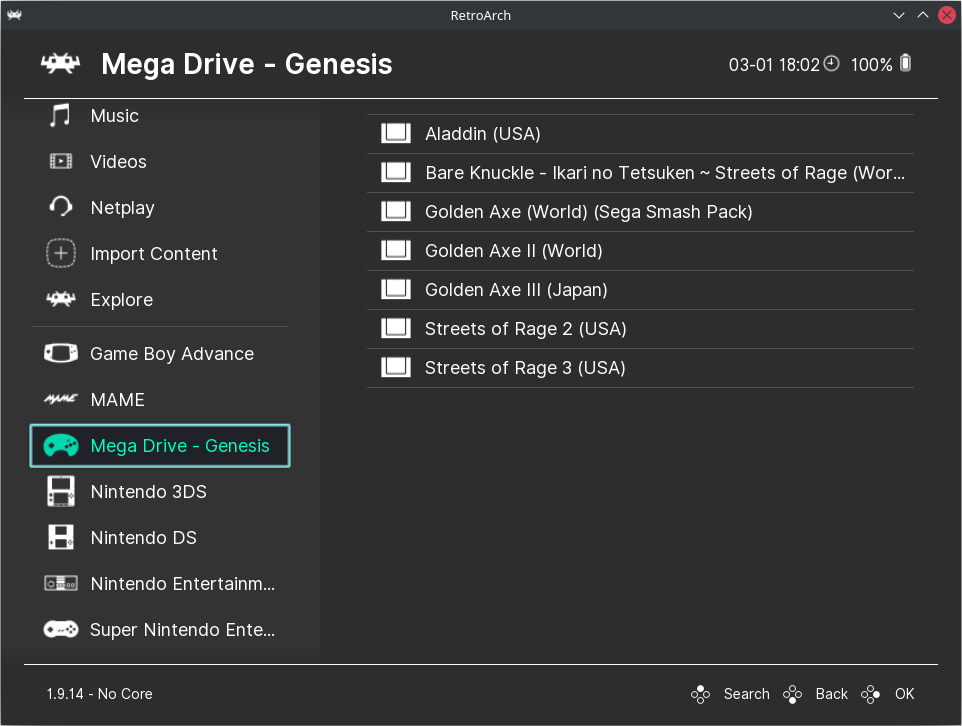
- Click Sega - Mega Drive - Genesis
- Now, you will find a new entry with the name Mega Drive - Genesis at the bottom of the main window.
How to add Sony Playstation 2 games to RetroArch
1- Add PCSX2 (Sony Playstation 2 emulator) to RetroArch
- From Main Menu choose Online Updater
- Click Core Downloader.
- Choose Sony - PlayStation 2 (PCSX2)
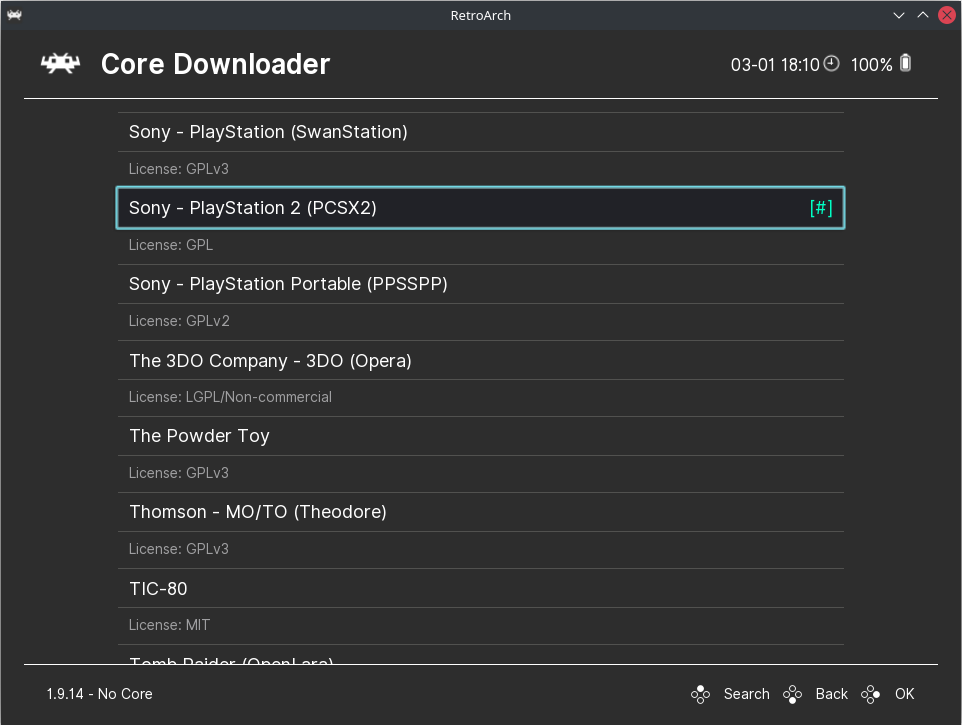
- Wait until it is successfully downloaded.
3- Add your Sony PlayStation 2 games to a playlist
- From Import Content choose Manual Scan
-
Click Content Directory and choose the location where you stored your Sony PlayStation 2 games.
-
Click System Name and select Sony - Playstation 2.
-
Click Default Core and select Sony - PlayStation 2 (PCSX2)
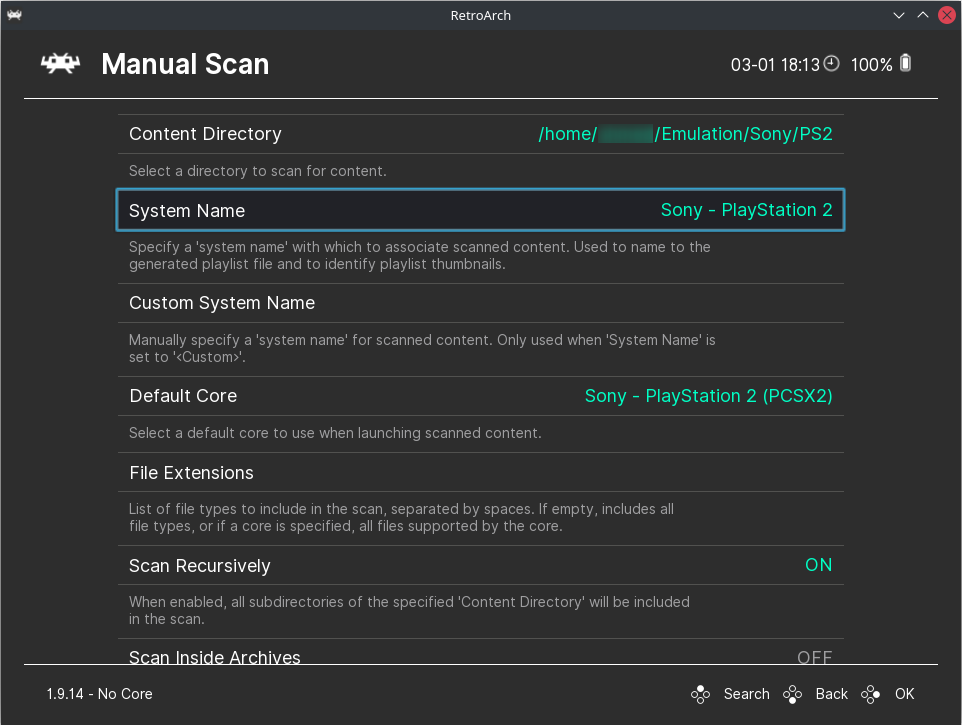
- Scroll down and click Start Scan.
4- Download thumbnails for your added games
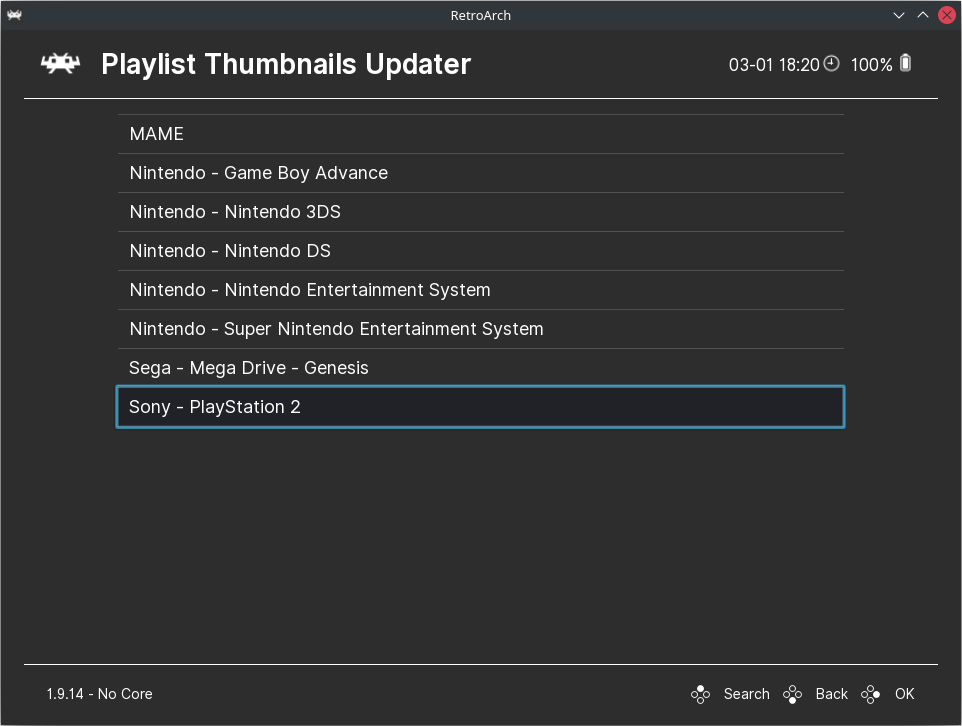
- From Main Menu choose Online Updater
- Click Playlist Thumbnails Updater
- Click Sony - PlayStation 2
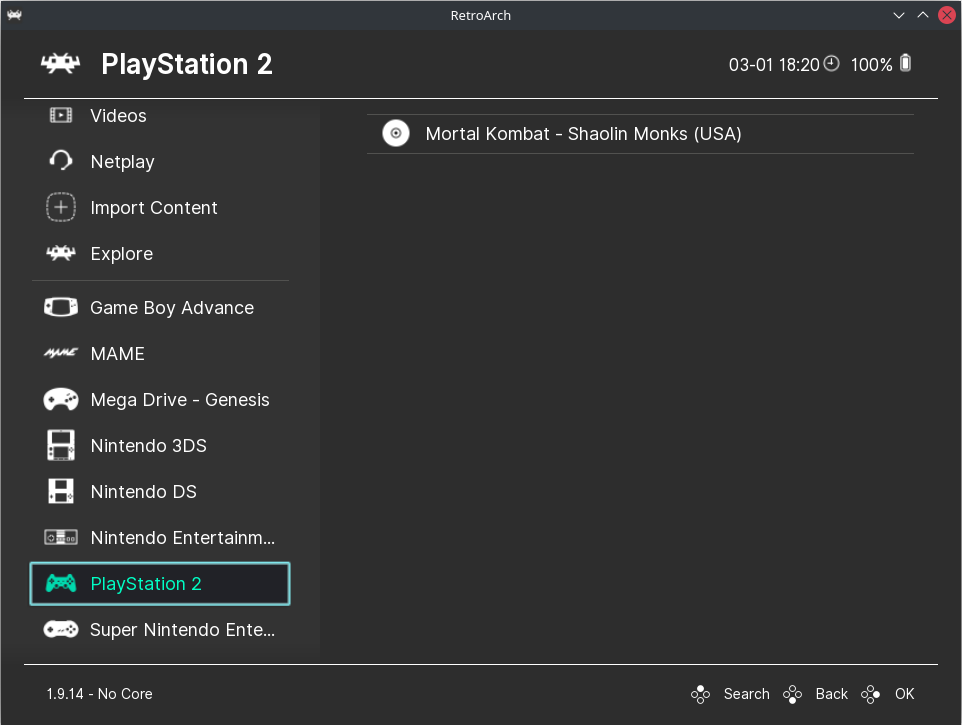
- Now, you will find a new entry with the name PlayStation 2 at the bottom of the main window.
How to add BIOS files required for each emulator
All of the emulators I have added in this tutorial do not require any additional BIOS files to run except PCSX2, the emulator for Sony Playstation 2.
- Check if the emulator requires additional BIOS files
- From Main Menu choose Show Desktop Menu
- Select any game from the playlist of the emulator you want to check its missing BIOS files.
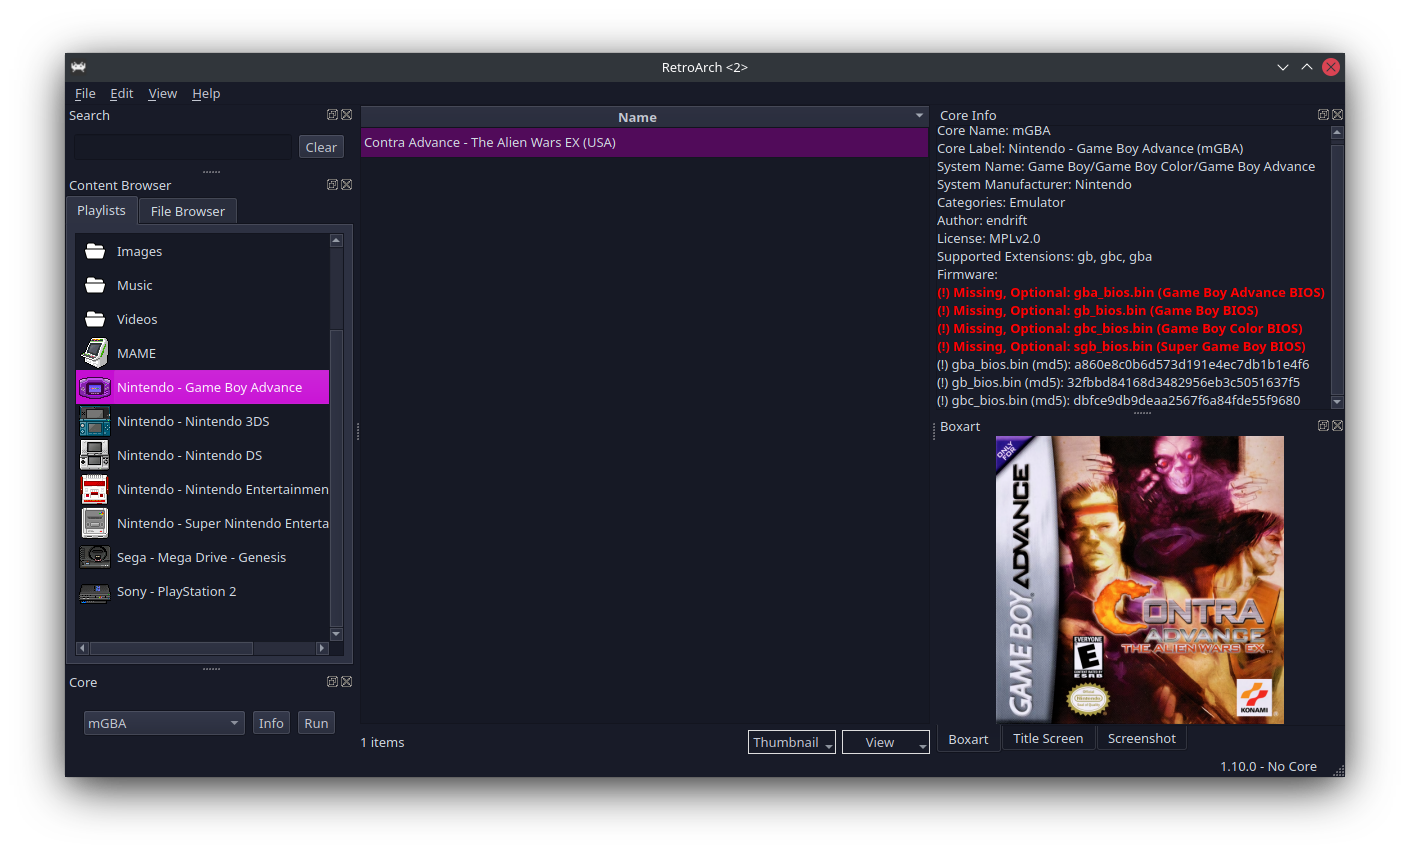
As you can see in the previous picture missing files appear in red, but all of them are optional.
Anyway, if there is any required file, you can download it from this repo -> [link]
How to add BIOS files required for PCSX2
Here is the part from Libretro docs
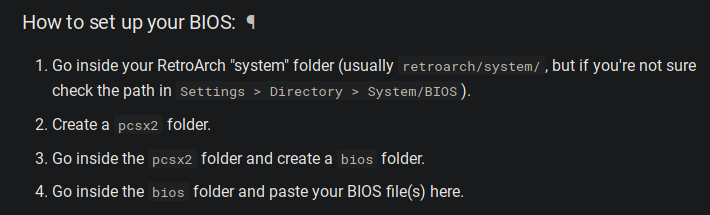
The directory location under Linux is ->/home/username/.config/retroarch/system/pcsx2/bios/
How to use shaders
There are many shaders to choose from, but I prefer crt shaders, and my favourite is crt-caligari, and there is how to use this shader:
-
Run any game from any of the playlists you added earlier.
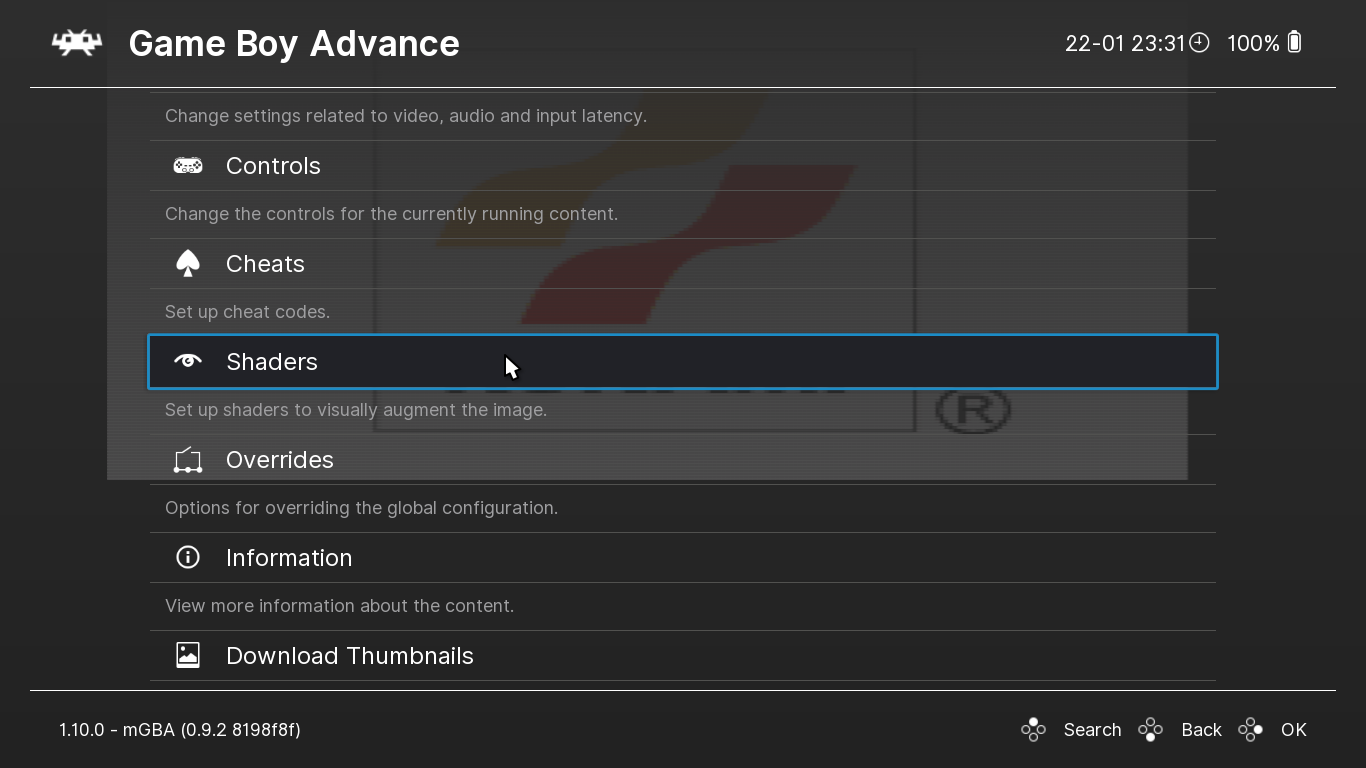
-
Press F1 from the keyboard to go to the menu of the game, and choose Shaders.
![Shaders picture1]()
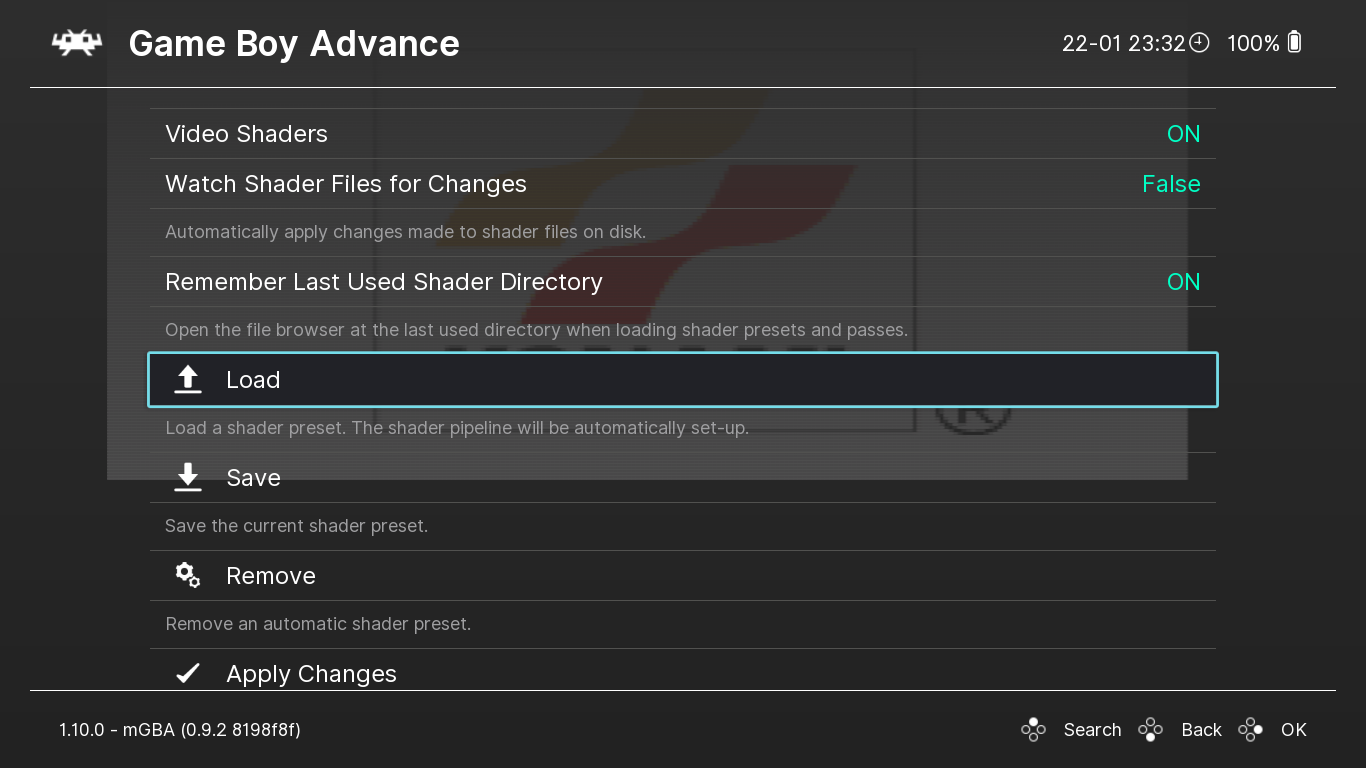
-
Click Load.
![Shaders picture2]()
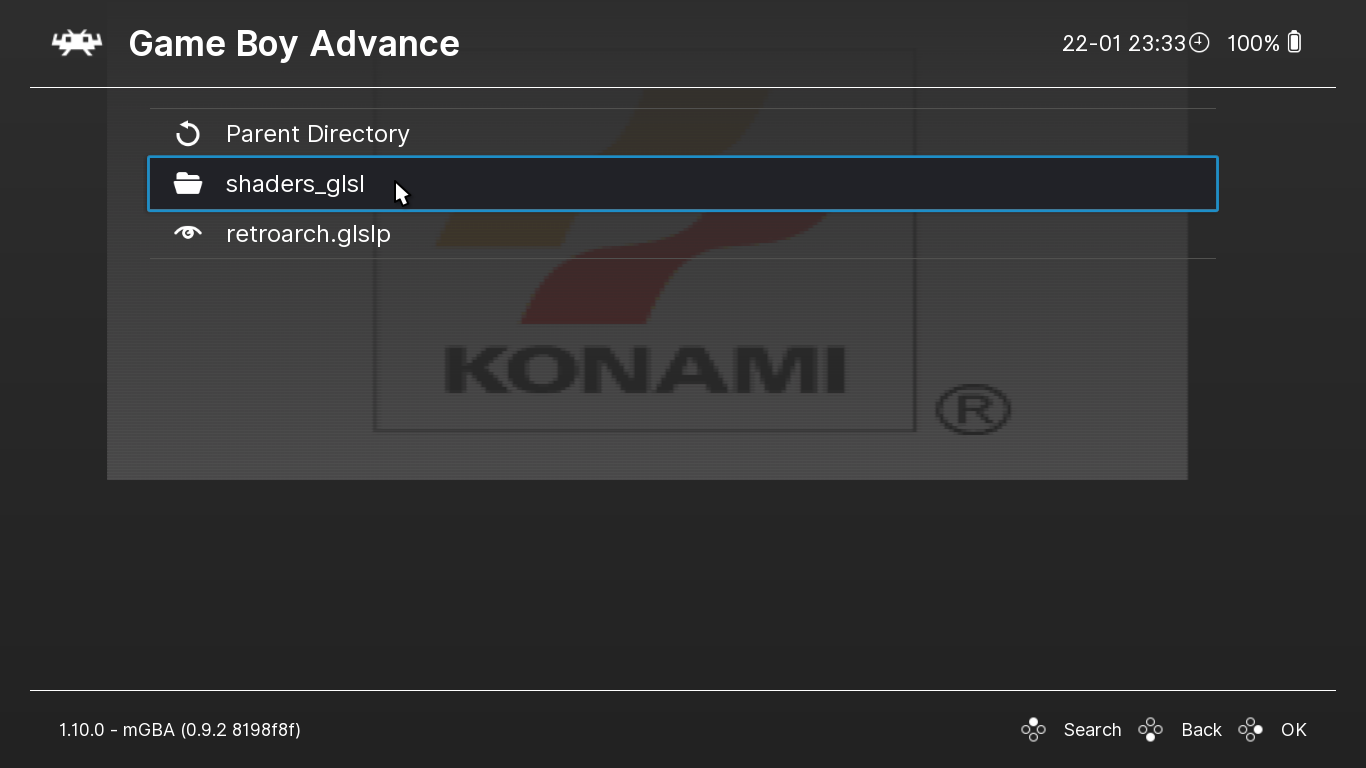
-
Click shaders_glsl.
![Shaders picture3]()
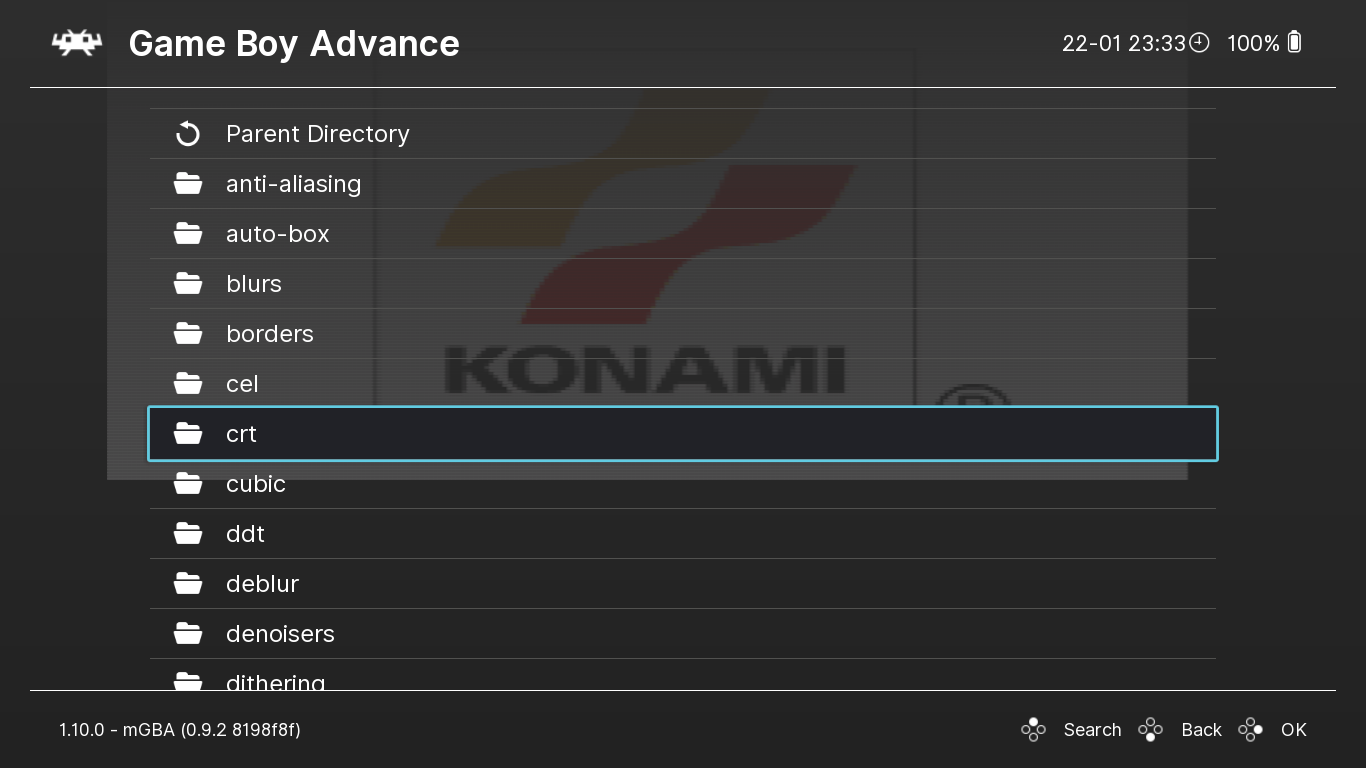
-
Select crt.
![Shaders picture4]()
-
Select crt-caligari.glslp
![Shaders picture5]()
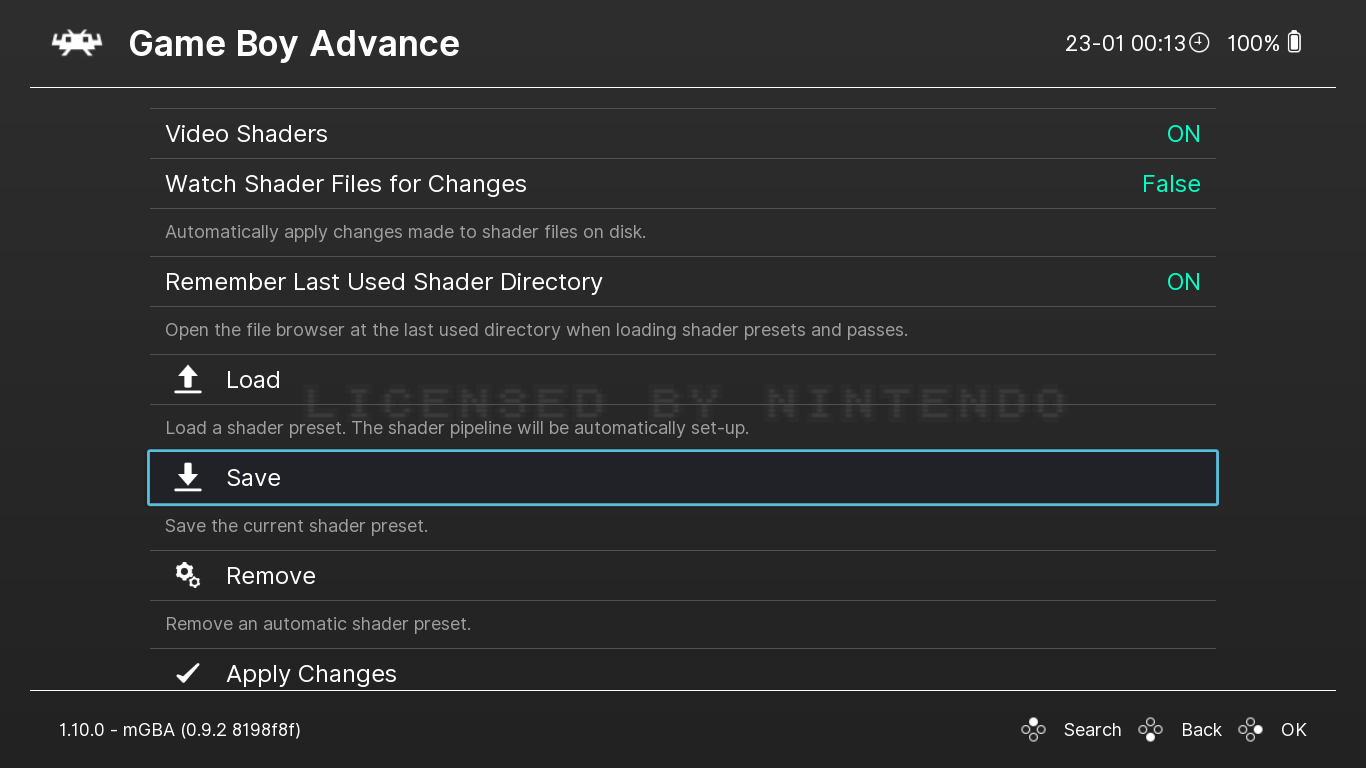
-
Click Save.
![Shaders picture6]()
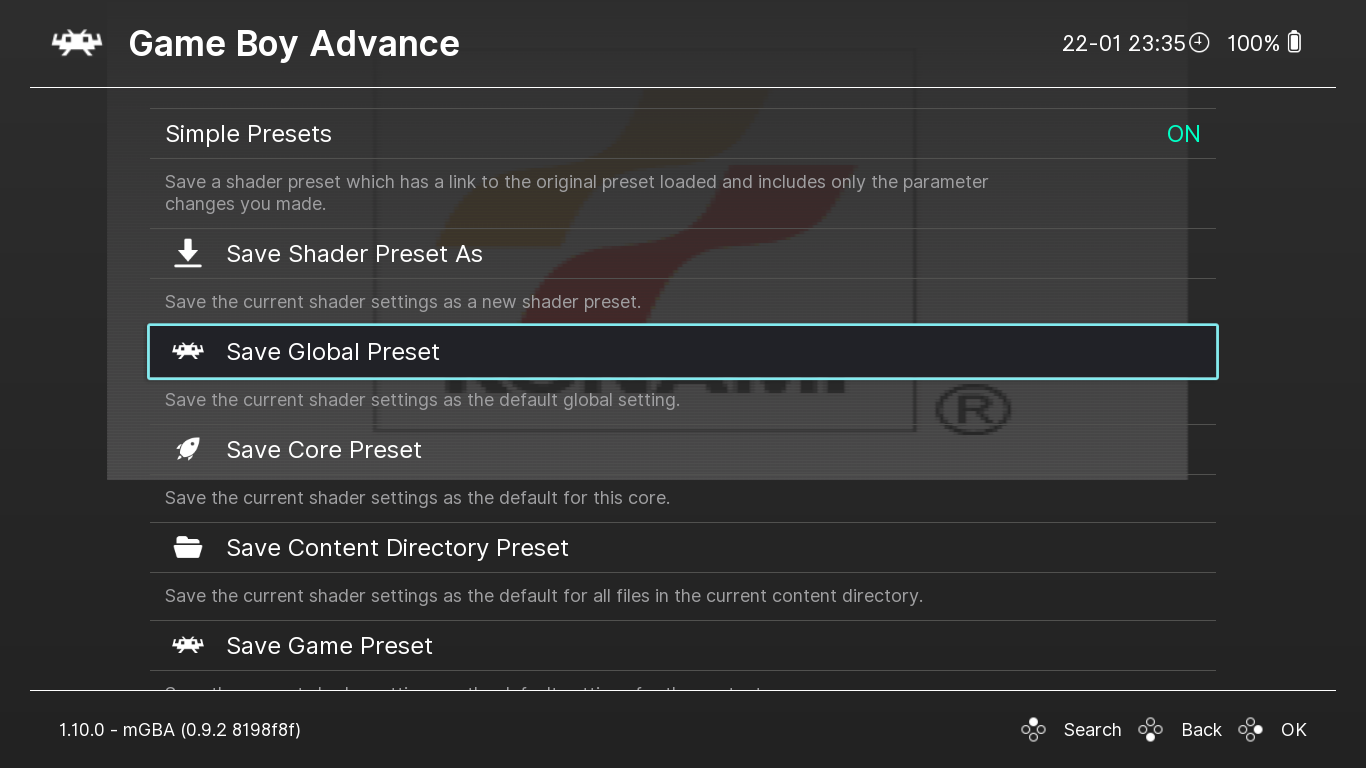
-
Click Save Global Preset to save the selected shaders as the default global settings for all games, or click Save Game Preset to save it for this game only.
![Shaders picture7]()

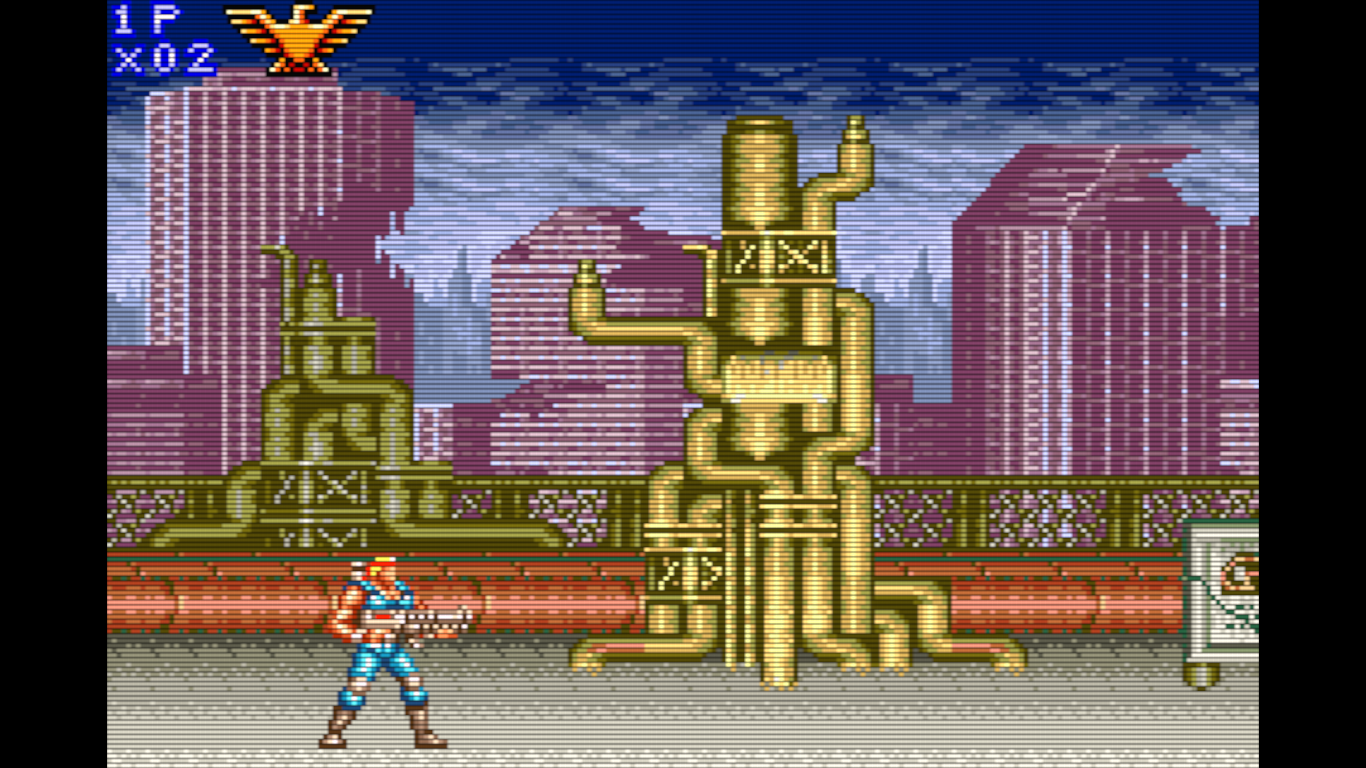
This shader imitats how the game looks like on CRT, and that is how the game looks with the shader (crt-caligari)
And that is how the game looks like without the shader (crt-caligari)
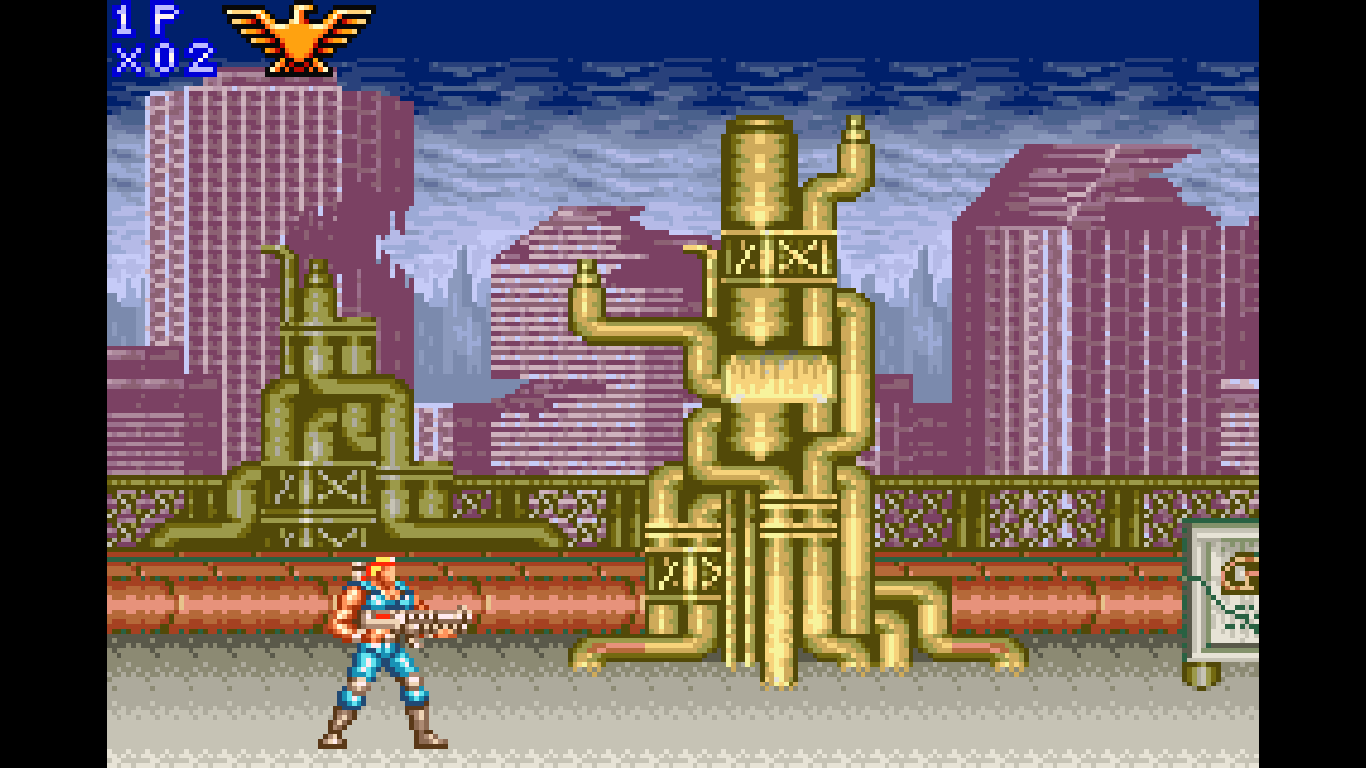
If you think that these two pictures look the same, focus on the eagle symbol at the top left-side of each picture.
If you have any questions, write it down below, or you can contact me directly by my E-mail account.
If you want to get notified when we post a new content by adding our RSS feed to your feed list, or by joining our Telegram channel.