Winecfg Tutorial for Beginners
What is winecfg
Winecfg is the Wine configuration editor. It allows you to change several settings that will be explained in details.
Winecfg contains 8 different tabs which are:
Applications, Libraries, and Graphics tabs are linked together! When you select Default Settings under Applications tab, all of the changes made within the Libraries and Graphics tabs will be changed for all applications, but when you configure a specific application under the Applications tab and select it, any changes made in Libraries tab or Graphics tab will affect only the selected application under Applications tab. This allows for custom settings for specific applications. It will be explained later in details.Applications
In this section, you can set Windows version for All applications, or you can Add application, and change Windows version for this application if it requires specific Windows version.
Wine create set one profile for your machine » Default Settings, but you can add custom profiles for specific applications if you want.
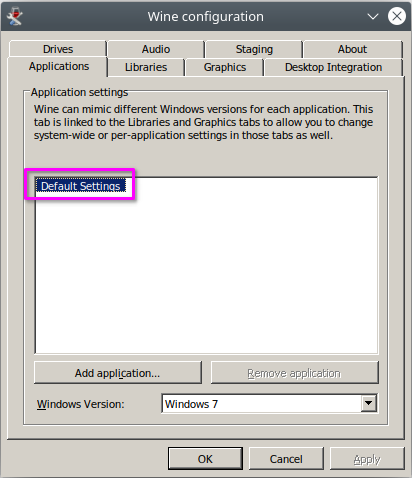
The default Windows version is Windows 7, but some applications work better with Windows XP. Also, a few new games require Windows 10
How to Add a custom profile for any application
- Open the terminal then type
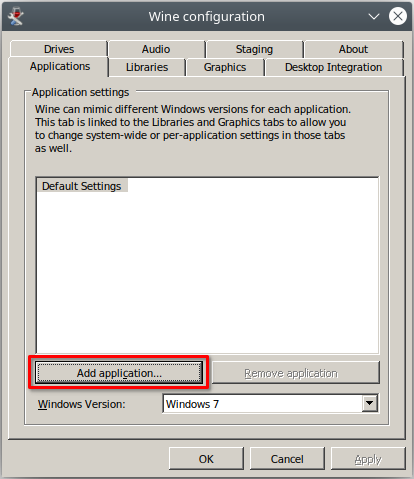
winecfgand press Enter. - Go to Applications, and click on Add application…
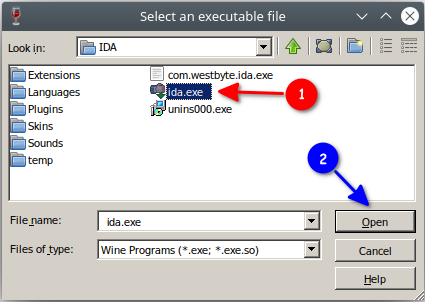
In this example, I will add an application that I installed using Wine (IDA) which is 32bit application, so I will go to Program Files (x86) » IDA » ida.exe
- Select the file, and press Open
- Change Windows Version to Windows XP instead of Use global settings (which is Windows 7 according to Default Settings).
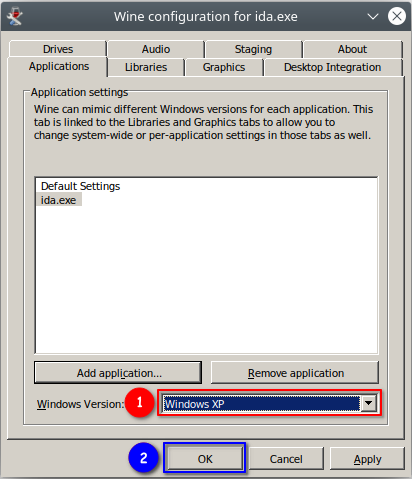
- Press Apply, or OK to confirm.
Libraries
Wine has its own way to handle Dynamic Link Libraries (DLL), and it is called Builtin which are located inside Wine prefix, on the other side DLL files taken from Windows are called Native
All DLL files are set to builtin by default, but you can set any DLL to native if you want which may be required by some applications.
How to set DLL to native
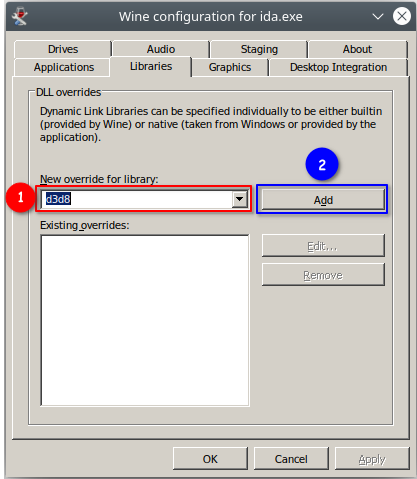
- Go to Libraries.
- Under New override for Library there is a menu, you can use it to select the name of the DLL, or you can type its name, then press Add.
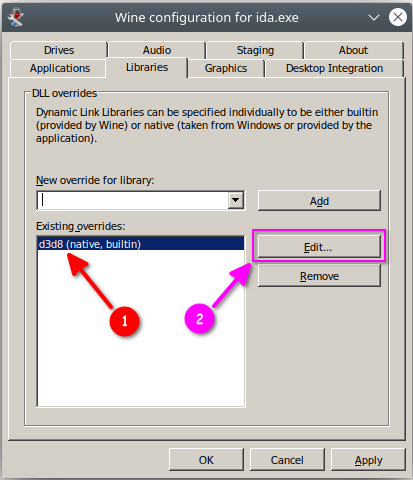
- After pressing Add, you will find the name of the DLL under Existing overrides.
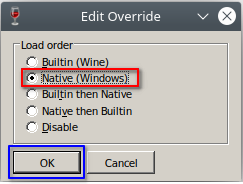
- Press Edit and choose Native (Windows), and press OK to confirm.
- Copy that DLL inside the directory contains the executable file of the application.
List of Override options
| Override option | What it does |
|---|---|
| Builtin | Use the DLL provided by Wine |
| Native | Use the DLL provided by Windows |
| Builtin then Native | Try to load Builtin DLL first, and if it fails, load Native DLL |
| Native then Builtin | Try to load Native DLL first and if it fails, load Builtin DLL |
| Disabled | Do not load this DLL at all |
- If you set a DLL needed by an application to Native only, and this DLL can not be found, or fails to load, the application requires it will not work.
- There are 2 kind of DLL files: 32bit, and 64bit. If your CPU is 64bit, you need to copy 64bit (X64) DLLs to system32 directory, and 32bit (X86) DLLs to syswow64
- Wine looks for native DLLs inside the directory that the program was started from, and the current directory, before checking system32, and syswow64 directories inside the Windows directory.
- If you use 32bit DLL with 64bit application, Wine wont load that DLL file.
- Native versions of these DLLs do not work:
kernel32.dll,gdi32.dll,user32.dll, andntdll.dll. These libraries require low-level Windows kernel access that simply does not exist within Wine. - There is a useful tool, Winetricks that can download and install many DLL files without having to do that by yourself. For more information visit this link » link
Graphics
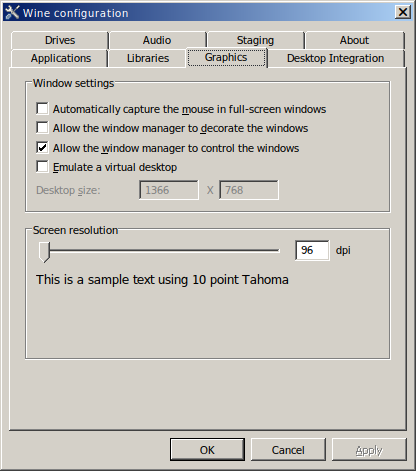
There are basically five different graphics settings you can configure. For most people the defaults are fine.

Automatically capture the mouse in full-screen windows
That setting is turned off by default. It can prevent the mouse from leaving the window of a full-screen program. That is mostly needed when using a virtual desktop. That setting is problematic when using multi monitors.
Allow the the Windows manager to decorate the windows
This setting is turned on by default, and there is no need to turn it off.
Here is a visual look to compare the difference it makes
Turned off
Turned on
Allow the the Windows manager to control the windows
This setting is turned on by default, and there is no need to turn it off.
Emulate a virtual desktop
That setting is turned off by default. After enabling it all programs will run in a separate window inside a virtual desktop. You may find this useful as a way to test buggy games that change (possibly unsuccessfully) the screen resolution, or with games that prevents you from using alt + tab combination to go to the desktop. It can also helps with old installers that runs at fullscreen mode.
You can use screen resolutions that is higher than the highest resolution that your screen can support, but your will not like the final result, so choose wisely, and keep the ration between width and height balanced.
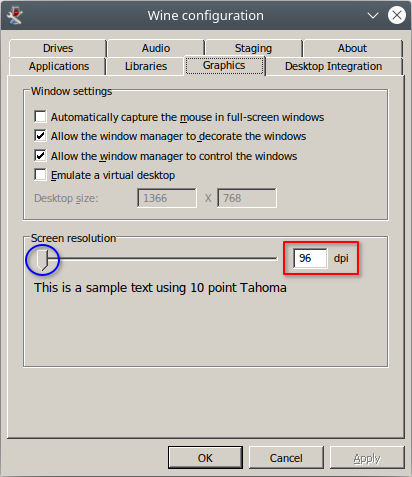
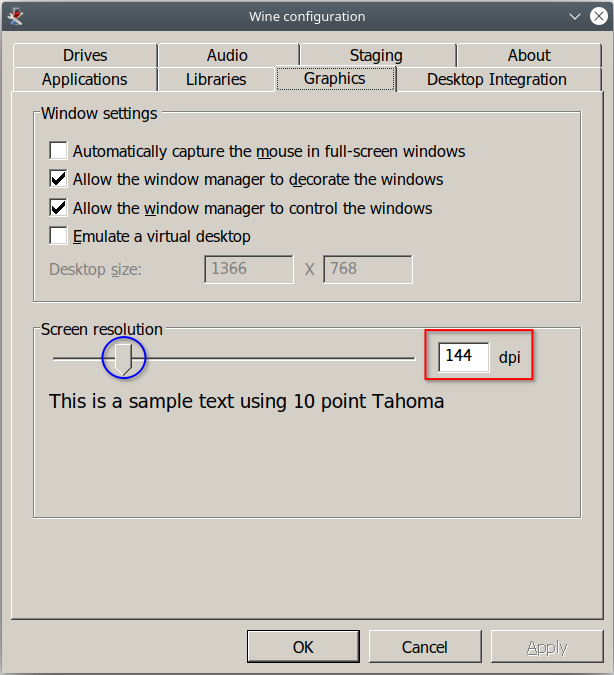
Screen resolutions
Under Screen resolution there is a slider that can increase dpi from 96 dpi to 480 dpi which increases the text size and the size of windows as well.
96 dpi
144 dpi
Desktop Integration
In this tab you can change the appearance of Wine, turn off MIME types, and change the linked user folders which will be explained later.
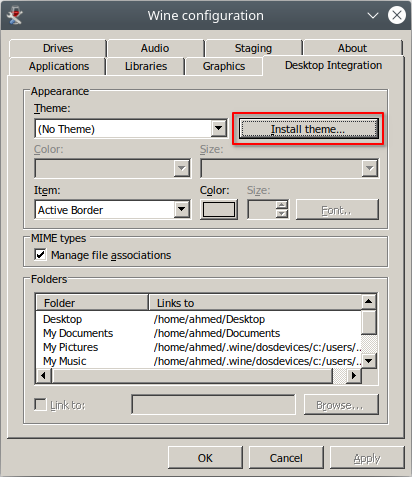
Appearance
Wine by default has this antique look of Windows 98 which does not look modern nowadays, but Wine support installing Windows XP themes which look quite better than the default look.
How to install theme on Wine
- Download Windows XP theme, but make sure it contains
.msstylesfile like this theme » https://www.istartedsomething.com/uploads/royale_noir.zip - Extract the compressed file.
- Click Install theme… under Desktop Integration tab
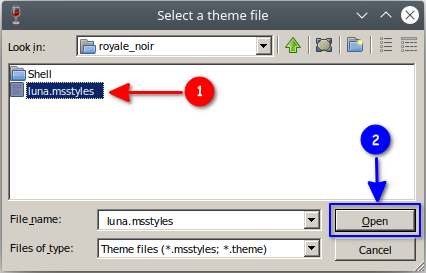
- Select a theme file »
~/Downloads/royale_noir/luna.msstyles
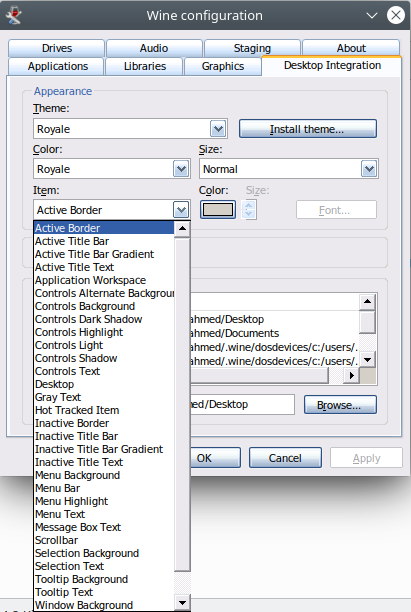
- Now, you can find Royal under Theme menu, pick it, and press OK

- Hola! Wine looks now like Windows XP.

If you want to optimize it even more, there is a big list under Item menu to choose from
MIME types
After installing a program using Wine, and that program add extensions to Registry, wine add these entries under ~/.local/share/applications and add them to mimeinfo.cache inside the same directory.
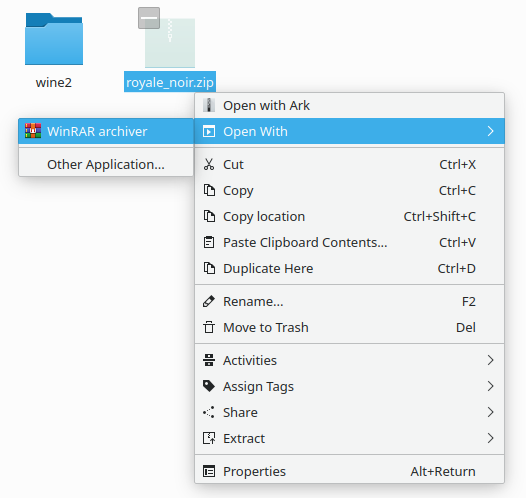
when WinRAR is installed on Wine, it registers all archieve extensions that it can open. After that when you right-click on a compressed file. you will find its name under Open With menu.
If for whatever reason, you want to suspend this behavior from Wine, you can unpick Manage file associations, and click Apply.

Folders
Wine manage a few folders like: Desktop, My Documents, My Pictures, My music, My Videos, Downloads, and Templates.
Wine link Desktop to your Linux’s Desktop directory, so desktop shortcuts created by Wine will appear at your desktop directly. It also link My Documents directory with your Linux’s Documents directory. The other directories are linked to the same directories inside your Home directory.
Drives
Windows requires a certain drive configuration that Wine imitates. Most people are familiar with the standard notation of the c: drive representing the primary system drive, and d: representing the secondary drive, e: representing the Flash drive, or DVD Rom, etc. Wine uses the same concept and maps those drives to the underlying native filesystem.
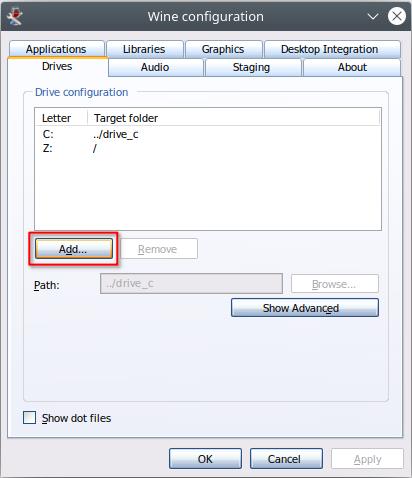
By default Wine maps c: to drive_c directory under ~/.wine directory, and z: to Root directory / which is your Linux system drive. Also, when you connect a Flash drive, insert a DVD disc or mount an ISO image, Wine will assign a letter to them automatically.
You can remove any of these letters by selecting any of them, and press Remove, but you can not remove letter C:
How to add a new drive to Wine
- Under Drives tab click Add…
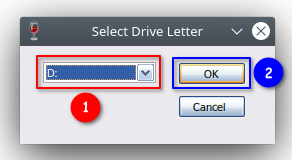
- Select Drive Letter, and press OK
- Click Browse…
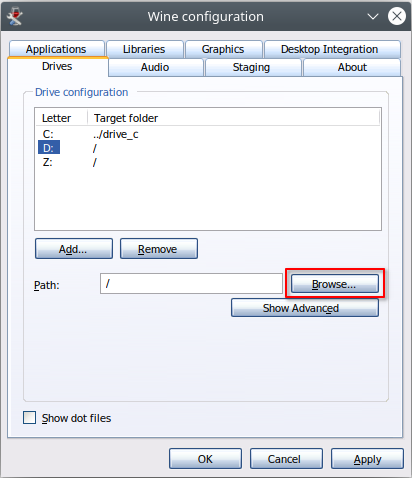
- Choose the directory you want to use as a drive
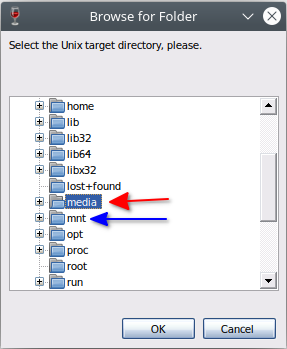
Linux mount the partitions of your hard disks, and Flash drives under /media or /mnt so check these directories when trying to open files or folders under Wine.
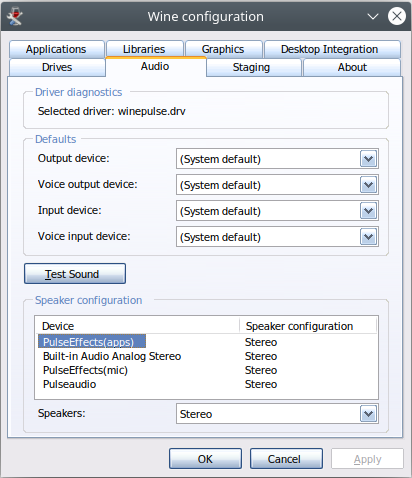
Audio
This tab can be used to change sound settings for Wine which is mostly unneeded, because Wine automatically set the right settings for your machine.
Staging
Staging tab is only available for Wine-staging only, and it has 5 options, 2 of them are grayed out (they are probably not available anymore).
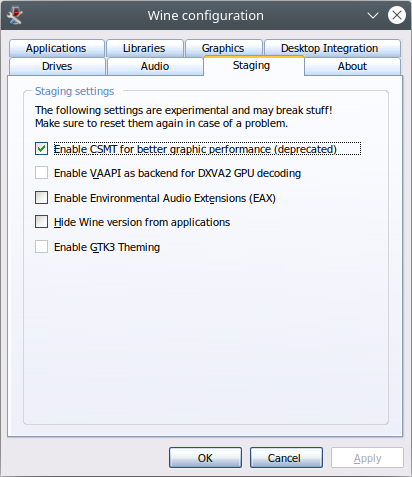
Enable CSMT for better graphic performance
CSMT helps Direct3D to work on Wine similar to Windows which helps with some graphical issues, and increase performance as well.
This option is enabled by default, and it is unnecessary to turn it off.
If you need more information, you can visit this link » https://wiki.winehq.org/Wine-Staging_CSMT
Enable Environmental Audio Extensions (EAX)
The Environmental Audio Extensions (or EAX) are a number of digital signal processing presets for audio, present in Creative Technology Sound Blaster sound cards. Some games uses this feature, so in order to use it under Wine, you need to enable this option.
Hide Wine version from Applications
This option is disabled by default, and when it is enabled, Wine does not declare its version. It may be useful with cheat engines that check if they are run under Wine or not, but cheat engines blocks Wine users anyway, but that may change in the future. Lets wait, and see.
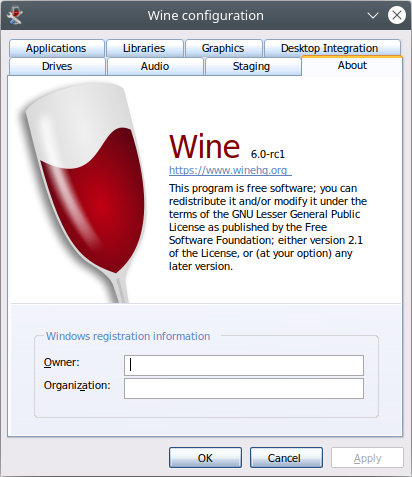
About
This tab shows the Wine logo, its version, a URL to Wine HQ, and a GNU LGPL notice.
It also has a couple of text boxes to allow you to set the Owner and Organization.
If you have any questions, write it down below, or you can contact me directly by my E-mail account.
If you want to get notified when we post a new content by adding our RSS feed to your feed list, or by joining our Telegram channel.